Hashnode Blog GitHub Action - fetch and display the latest blogs in a nice format
GitHub action to fetch and display your latest blog from Hashnode in a visually pleasing manner

As a developer, it is essential to have a GitHub account and profile to showcase your work and skills. You can include information such as your introduction, current projects, skills, contributions, and more. However, you can also leverage the power of Hashnode to share your latest blogs and increase your visibility. By doing this, your followers can stay updated on your knowledge-sharing activities and learn from your expertise.
I felt the same and added my latest blogs to my GitHub profile. As we know, GitHub supports markdown for profile README, so I have manually added my latest five blogs to my profile. However, this process became tedious and repetitive because I had to manually update my profile README whenever I published a new blog.
I started looking into how I can automate this process and have the latest updated blogs on my profile. At the same time, Hashnode announced that they have a huge update in their APIs, and new APIs are publicly available. I knew that if I wanted to automate something on GitHub, GitHub Actions was the best solution.
I already knew what GitHub Actions are and how they work; however, I did not know how to build one. I was very curious to create my own GitHub Action and make it available to the community so that others could also use it. Therefore, I decided to invest my time in learning how to build my own GitHub Actions that would help me fetch the latest post from my Hashnode publication and then display it on my Profile README.

For those of you who don't know what GitHub Actions are, you can read my blog here.
One more reason to build something with Hashnode APIs is the Hashnode APIs Hackathon. In this article, I will discuss what Hashnode Blog GitHub action is, the problem it solves, its functionality, how I built it, the challenges I faced, how I solved them, and more.
What is Hashnode blog GitHub Action?
It's a GitHub action to fetch and display your latest blog from Hashnode in a visually pleasing manner. If you are writing on Hashnode (if you don't have a blog yet, set it up here) and want to showcase your latest blogs on your profile README, you can use the Hashnode Blog Action to achieve the same.
Configuring the Hashnode Blog GitHub Action is straightforward, and it supports the following configuration options.
| Option | Description | Default | Required |
HASHNODE_PUBLICATION_NAME | Your hashnode publication name, Example: blog.hashnode.dev | null | true |
POST_COUNT | The number of posts counts | 6 | false |
FORMAT | Output format (table, list, card, stacked) | table | false |
FILE | Filename to save the output | README.md | false |
DEBUG | Run action in debug mode | false | false |
You can create a GitHub workflow as shown below to execute the Hashnode Blog Action.
You can replace blog.sachinchaurasiya.dev with your publication name, and you can also add the FORMAT, FILE, and POST_COUNT options. If you do not provide values for these options, the default values will take effect.
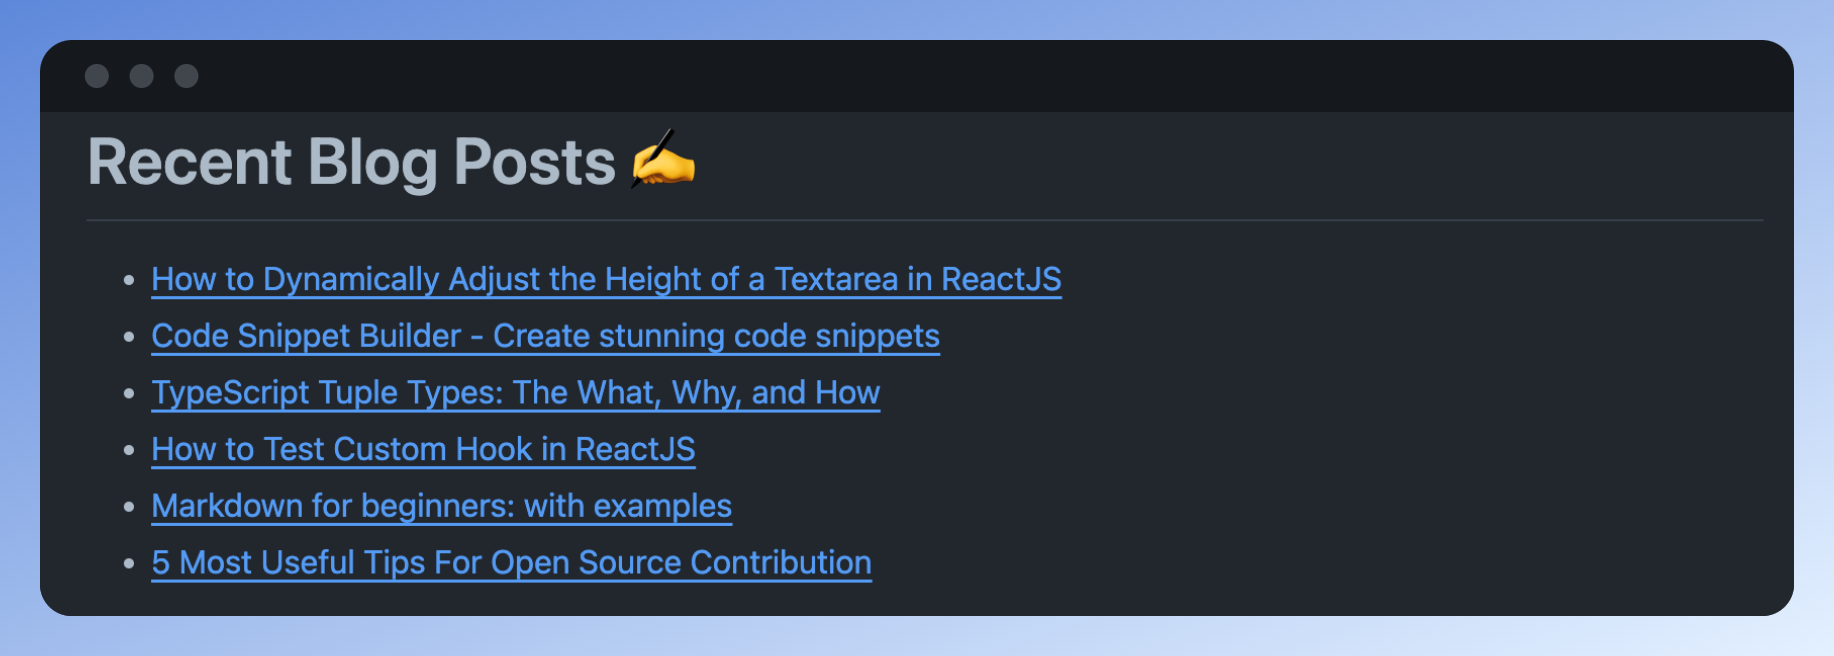
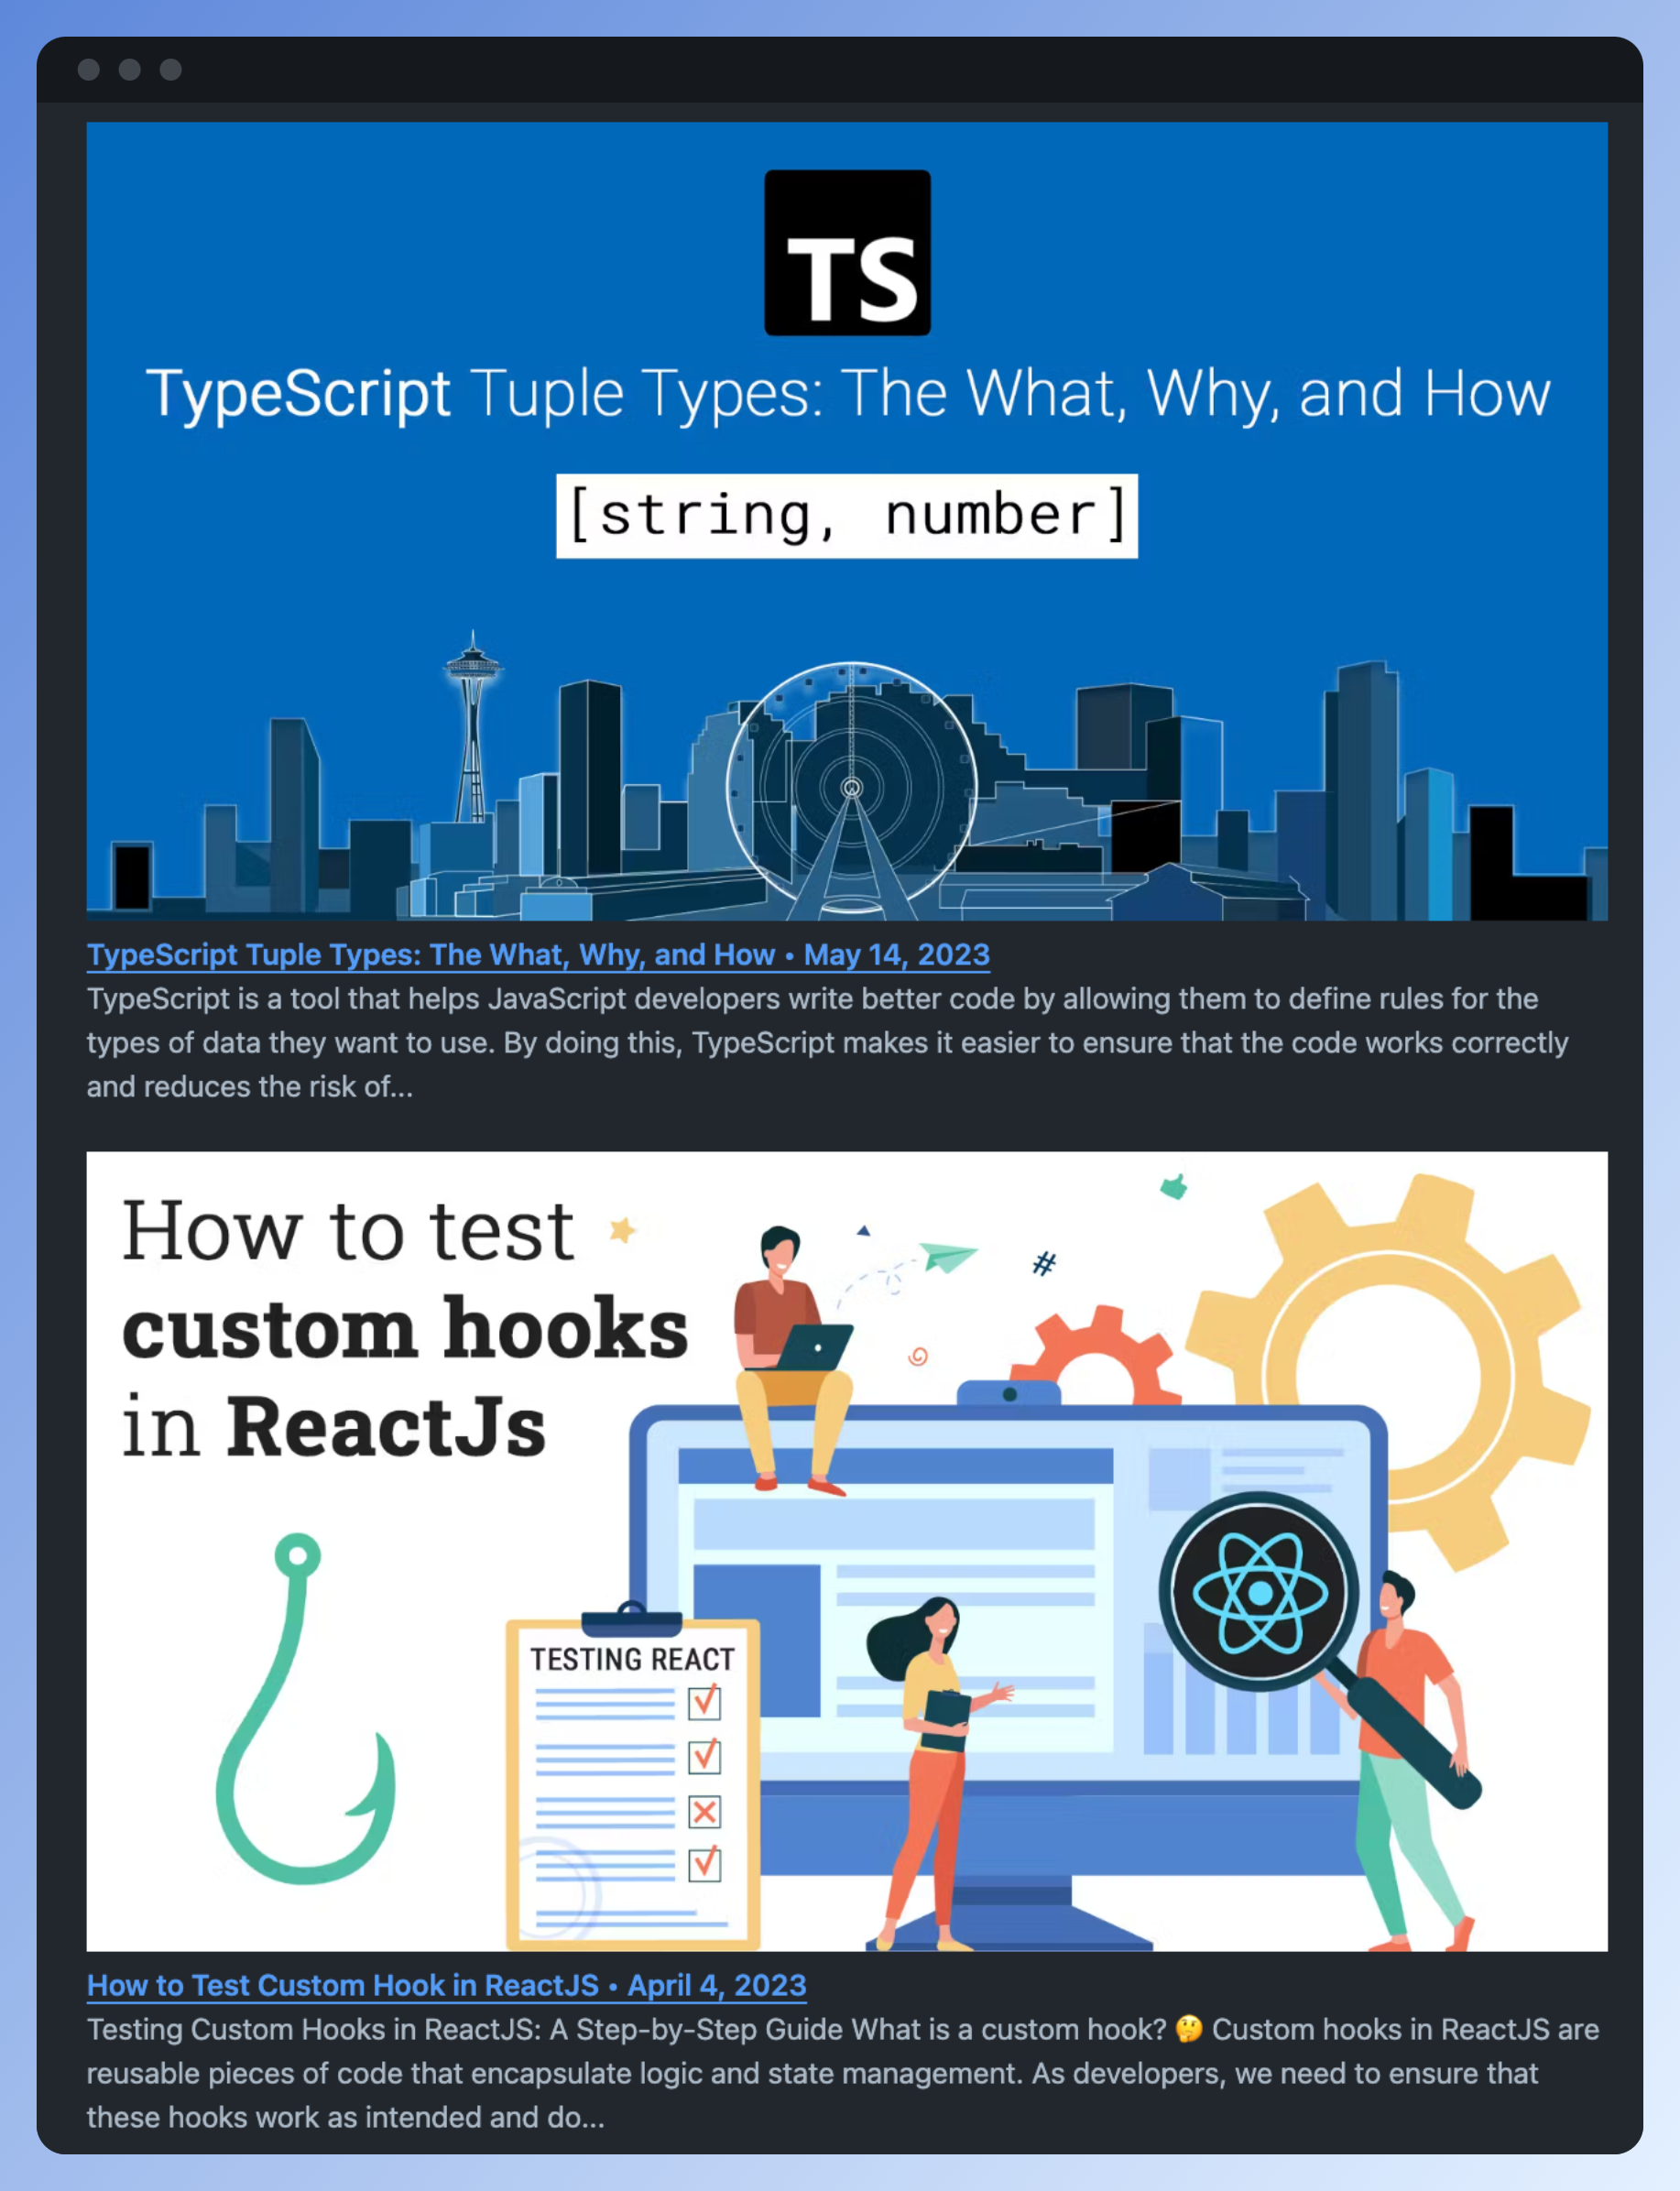
Examples of different available FORMAT options.
List
Stacked
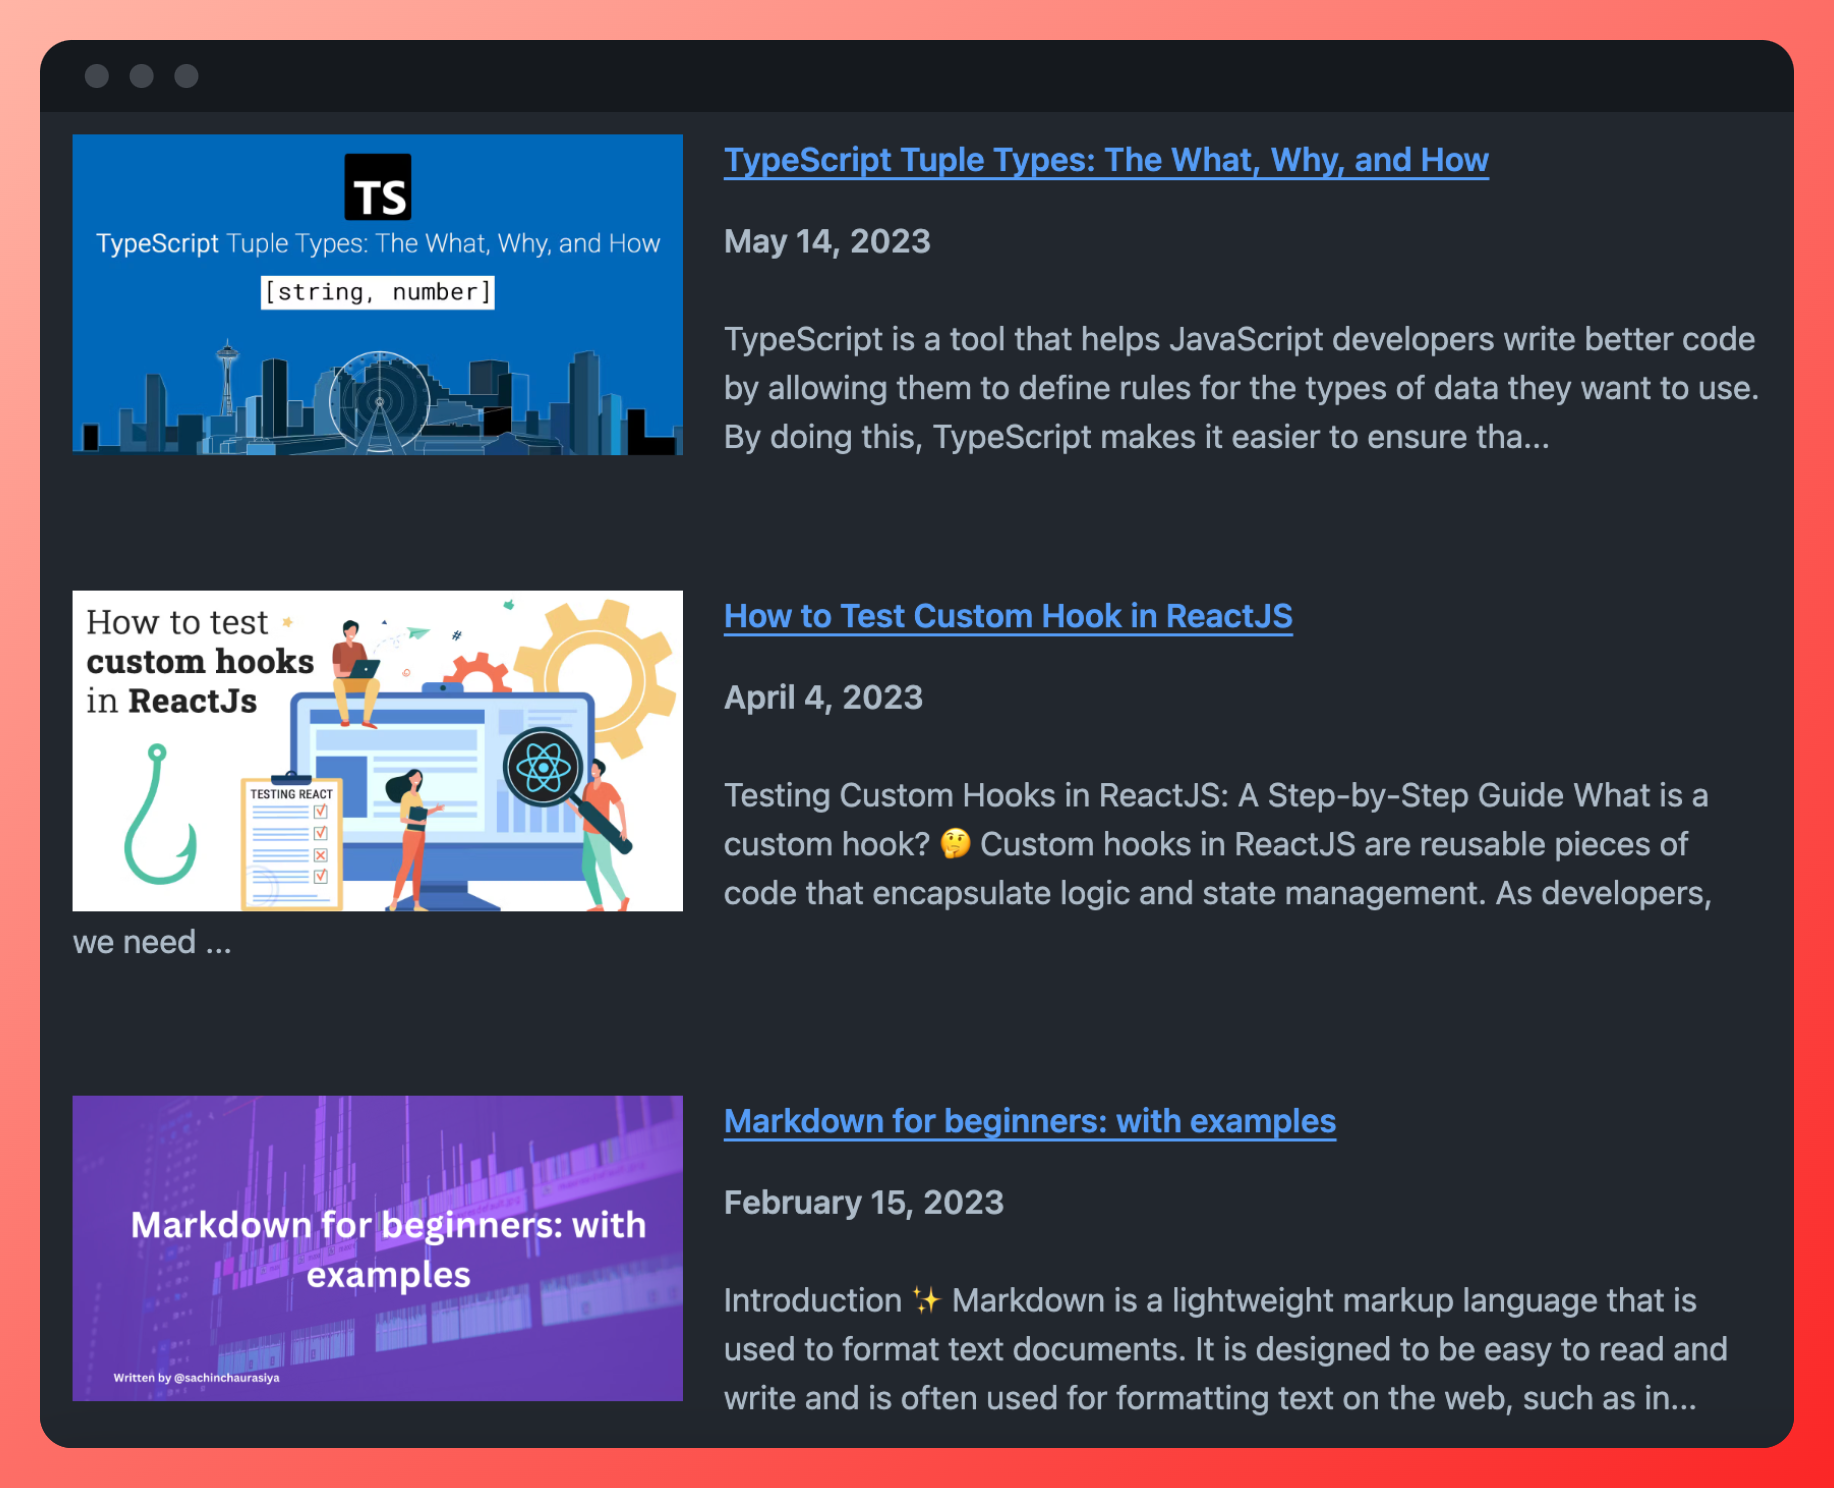
Table

Card
Now that you understand the Hashnode Blog GitHub action, its functionality, and how it works, the upcoming section will delve into how I built it, the challenges I encountered, and how I resolved them.
How I Built the Hashnode Blog GitHub Action?
While learning about GitHub Actions, I came across the GitHub Actions Org, and they have a bunch of templates for building custom GitHub actions. So, I started searching for a template that has TypeScript support, ensuring type safety to write bug-free code. I found the typescript-action template that includes support for tests, linter, versioning, and more.
I clicked on the Use this template button, and within minutes, I had a basic GitHub action with TypeScript support. I then started adding code for my action logic.
First, I defined all the configuration and meta-information for my action in, including the name, description, author information, branding information, inputs, Node.js version, and entry point.
name: 'Hashnode Blog Action'
description: 'Action to pull your latest blog and show it in a nice format.'
author: 'Sachin-chaurasiya'

branding:
  icon: 'hash'
  color: 'blue'

inputs:
  HASHNODE_PUBLICATION_NAME:
    description: 'Your hashnode publication name, Example: blog.hashnode.dev'
    required: true
  POST_COUNT:
    description: 'Number of posts count'
    required: false
    default: 6
  FORMAT:
    description: 'Output format (table, list, card)'
    required: false
    default: 'table'
  FILE:
    description: 'File name to save the output'
    required: false
    default: 'README.md'
  DEBUG:
    description: 'Debug mode'
    required: false
    default: false

runs:
  using: node20
  main: dist/index.js
Then, I started working on logic to fetch the posts from Hashnode using a GraphQL query. I have not used any third-party library for querying Hashnode APIs, I just utilized the JavaScript Fetch API.
import { HashNodeArticleResponse } from 'HashNodeTypes'

export const BASE_URL = 'https://gql.hashnode.com/'

const getQuery = (publicationName: string, limit: number): string => {
  return `{
  publication(host: "${publicationName}") {
    posts(first: ${limit}) {
      totalDocuments
      pageInfo {
        hasNextPage
        endCursor
      }
      edges {
        node {
          url
          title
          brief
          slug
          publishedAt
          coverImage {
            url
          }
          reactionCount
          replyCount
        }
      }
    }
  }
}`
}

export const fetchPosts = async (
  publicationName: string,
  limit: number
): Promise<HashNodeArticleResponse> => {
  const query = getQuery(publicationName, limit)
  const response = await fetch(BASE_URL, {
    method: 'POST',
    headers: {
      'Content-Type': 'application/json'
    },
    body: JSON.stringify({ query })
  })
  const data = await response.json()

  return data
}
Then, I worked on utilities such as date and formats. Format utilities are designed to process the response from the Hashnode API posts and return the Markdown string for the requested output format.
For example, the piece of code below will process the list of posts and return the table Markdown format.
const createMarkdownTable = (postList: PostNode[]): string => {
  let tableContent = '<table>'

  postList.forEach(post => {
    const { title, brief, coverImage, url } = post

    tableContent += '<tr>'
    tableContent += `<td><img src="${coverImage.url}" alt="${title}"></td>`
    tableContent += `<td><a href="${url}"><strong>${title}</strong></a><br>${brief}</td>`
    tableContent += '</tr>'
  })

  tableContent += '</table>'

  return tableContent
}
Last but not least, I worked on the entry point of the action, which is the main.ts file. This file includes logic for obtaining inputs, fetching posts, processing the posts, obtaining the output in markdown format, and then finding and replacing that content within a specified regex pattern. Finally, it commits and pushes the changes to the user file repository.
import * as core from '@actions/core'
import { fetchPosts } from './hashnodeQuery'
import fs from 'fs'
import commitFile from './commitFiles'
import { getFormattedContent } from './utils/formatUtils'
import { ContentFormat } from 'HashNodeTypes'

const SECTION_REGEX =
  /^(<!--(?:\s|)HASHNODE_BLOG:(?:START|start)(?:\s|)-->)(?:\n|)([\s\S]*?)(?:\n|)(<!--(?:\s|)HASHNODE_BLOG:(?:END|end)(?:\s|)-->)$/gm

/**
 * The main function for the action.
 * @returns {Promise<void>} Resolves when the action is complete.
 */
export async function run(): Promise<void> {
  try {
    const publicationName: string = core.getInput('HASHNODE_PUBLICATION_NAME')
    const postCount: number = parseInt(core.getInput('POST_COUNT'))
    const outputFileName: string = core.getInput('FILE')
    const format: ContentFormat = (core.getInput('FORMAT') ??
      'table') as ContentFormat
    const isDebug: boolean = core.getInput('DEBUG') === 'true'

    // fetch posts from hashnode
    const response = await fetchPosts(publicationName, postCount)
    const posts = response.data.publication.posts.edges.map(edge => edge.node)

    const filePath = `${process.env.GITHUB_WORKSPACE}/${outputFileName}`
    const fileContent = fs.readFileSync(filePath, 'utf8')

    const output = getFormattedContent(posts, format)

    const result = fileContent
      .toString()
      .replace(SECTION_REGEX, `$1\n${output}\n$3`)

    fs.writeFileSync(filePath, result, 'utf8')

    // commit changes to the file when not in debug mode
    if (!isDebug) {
      // eslint-disable-next-line github/no-then
      await commitFile().catch(err => {
        core.error(err)
        core.info(err.stack)
        process.exit(err.code || -1)
      })
    }
  } catch (error) {
    // Fail the workflow run if an error occurs
    if (error instanceof Error) core.setFailed(error.message)
  }
}
Now that you have an understanding of how I built the action, let's delve into the challenges I faced in the next section.
Challenges Faced
The typescript-action template had a lot of pre-configured workflows. So, when I tried to build the action for the first time, it gave me a bunch of errors.

The second challenge was committing and pushing the changes to the user's file repository. This was, I would say, an exciting challenge, as it was my first time committing and pushing changes programmatically in GitHub.
I thought, No problem! I'm an engineer, and it's my job to face challenges and find solutions. Now, let me explain how I tackled these challenges.
How I Solved the Challenges
To overcome the initial challenge, I carefully read the guide in the template's README and adjusted or changed the workflows to fit my requirements. The key takeaway here is that reading the available documentation can be helpful.
The second challenge was a bit tricky, but I believed that every problem has a solution. I began by searching on Google to find out how to automatically commit and push changes to a GitHub repository. Unfortunately, I couldn't find helpful resources. So, I turned to ChatGPT and GitHub Copilot for assistance. They guided me towards using the GitHub Action bot config to commit and push changes. Check out the bash file for the details on how to do this for the user's file repository.
#!/bin/sh

set -e

if [ -z "$GITHUB_TOKEN" ]; then
    echo "🚩  GITHUB_TOKEN Not Found. Please Set It As ENV Variable"
    exit 1
fi

git config --global user.email "githubactionbot+hashnode@gmail.com"
git config --global user.name "Hashnode Bot"

DEST_FILE="${INPUT_FILE}"

GIT_URL="https://x-access-token:${GITHUB_TOKEN}@github.com/${GITHUB_REPOSITORY}.git"

git add "${GITHUB_WORKSPACE}/${DEST_FILE}" -f

if [ "$(git status --porcelain)" != "" ]; then
    git commit -m "📚 Latest Blog Updated"
else
    echo "  ✅ Blog List Upto Date"
fi

git push "$GIT_URL"
As this is not something that will be generated on every new build, I directly placed it in the dist directory.
Then, wrote a simple utility function to execute this Bash file and commit and push the changes.
import { spawn } from 'child_process'
import path from 'path'

const exec = async (cmd: string, args: string[] = []): Promise<number> =>
  new Promise((resolve, reject) => {
    const app = spawn(cmd, args, { stdio: 'inherit' })
    app.on('close', (code: number) => {
      if (code !== 0) {
        const err = new Error(`Invalid status code: ${code}`)
        Object.defineProperty(err, 'code', { value: code })
        return reject(err)
      }
      return resolve(code)
    })
    app.on('error', reject)
  })

const main = async (): Promise<number> => {
  return await exec('bash', [path.join(__dirname, './commit.sh')])
}

export default main
This utility function uses the spawn function to execute bash commands.
Conclusion
I hope you find this article genuinely helpful, and that you've learned something from it. I've released the Hashnode blog GitHub action on the GitHub marketplace, so feel free to try it out and share your feedback. It's open source, so pull requests are welcome. You can report bugs, request features, and more.
Show your support for the project by giving it a star ⭐️.
Lastly, I want to express my gratitude to Hashnode for providing this fantastic opportunity to create something using Hashnode's brand-new set of APIs.
And that’s it for this topic. Thank you for reading.