

How to Create a free backup for your WordPress site
Create a free backup for your WordPress site.


Hello people, hope you are doing great, welcome to WordPress Tips and Tricks series.
In this article, I will be talking about how you can create a free backup for your WordPress site, I will walk you through step by step.
So let's get started.
Login into the WordPress dashboard

Install the plugin
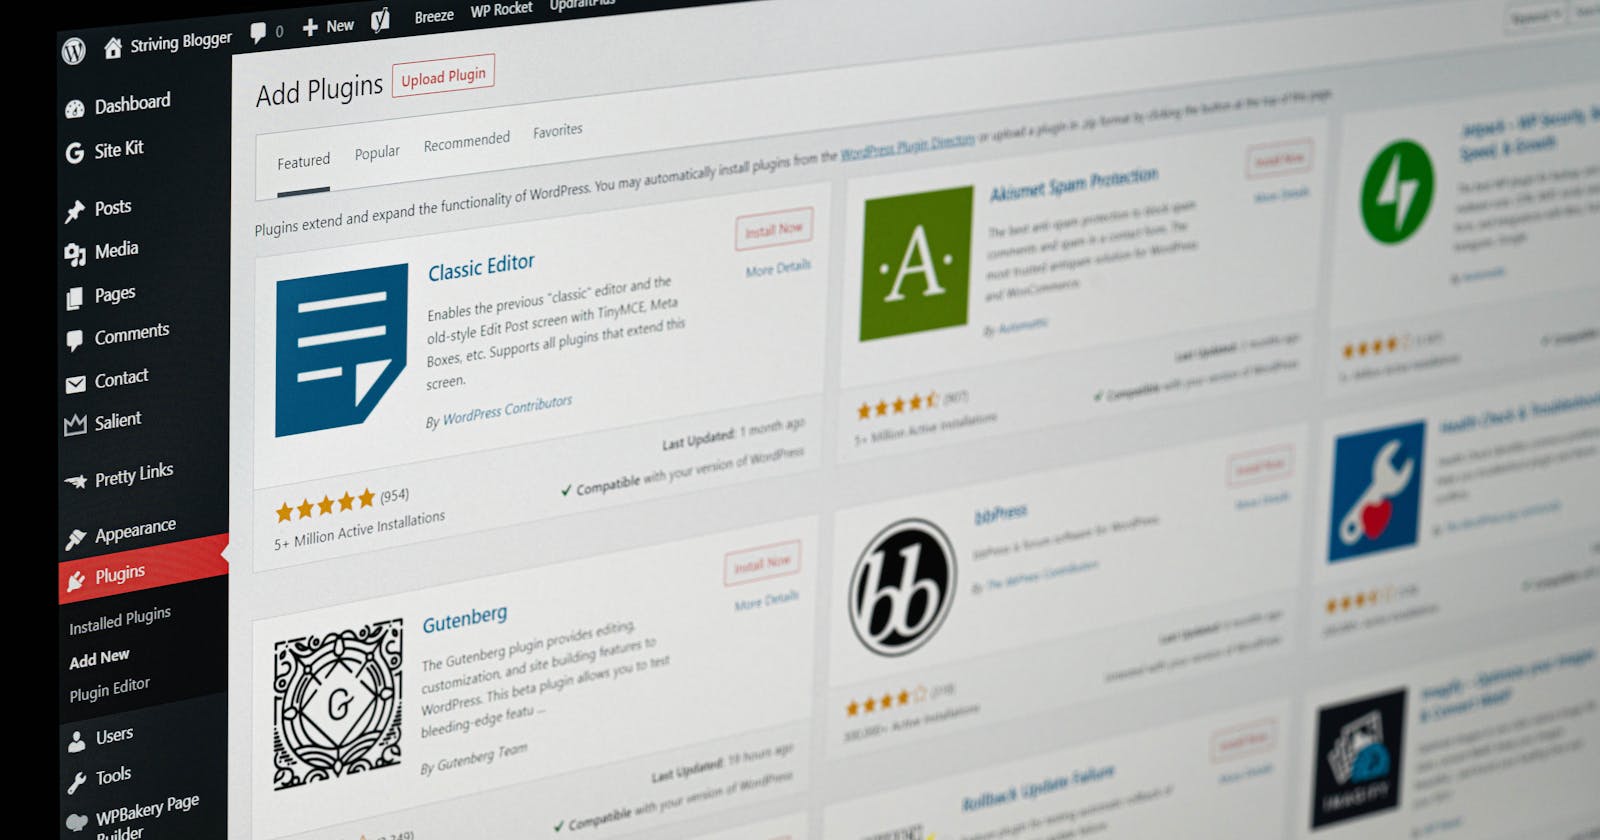
From the left panel click on Plugins, then click on Add new and It will take you to the Add Plugins page.

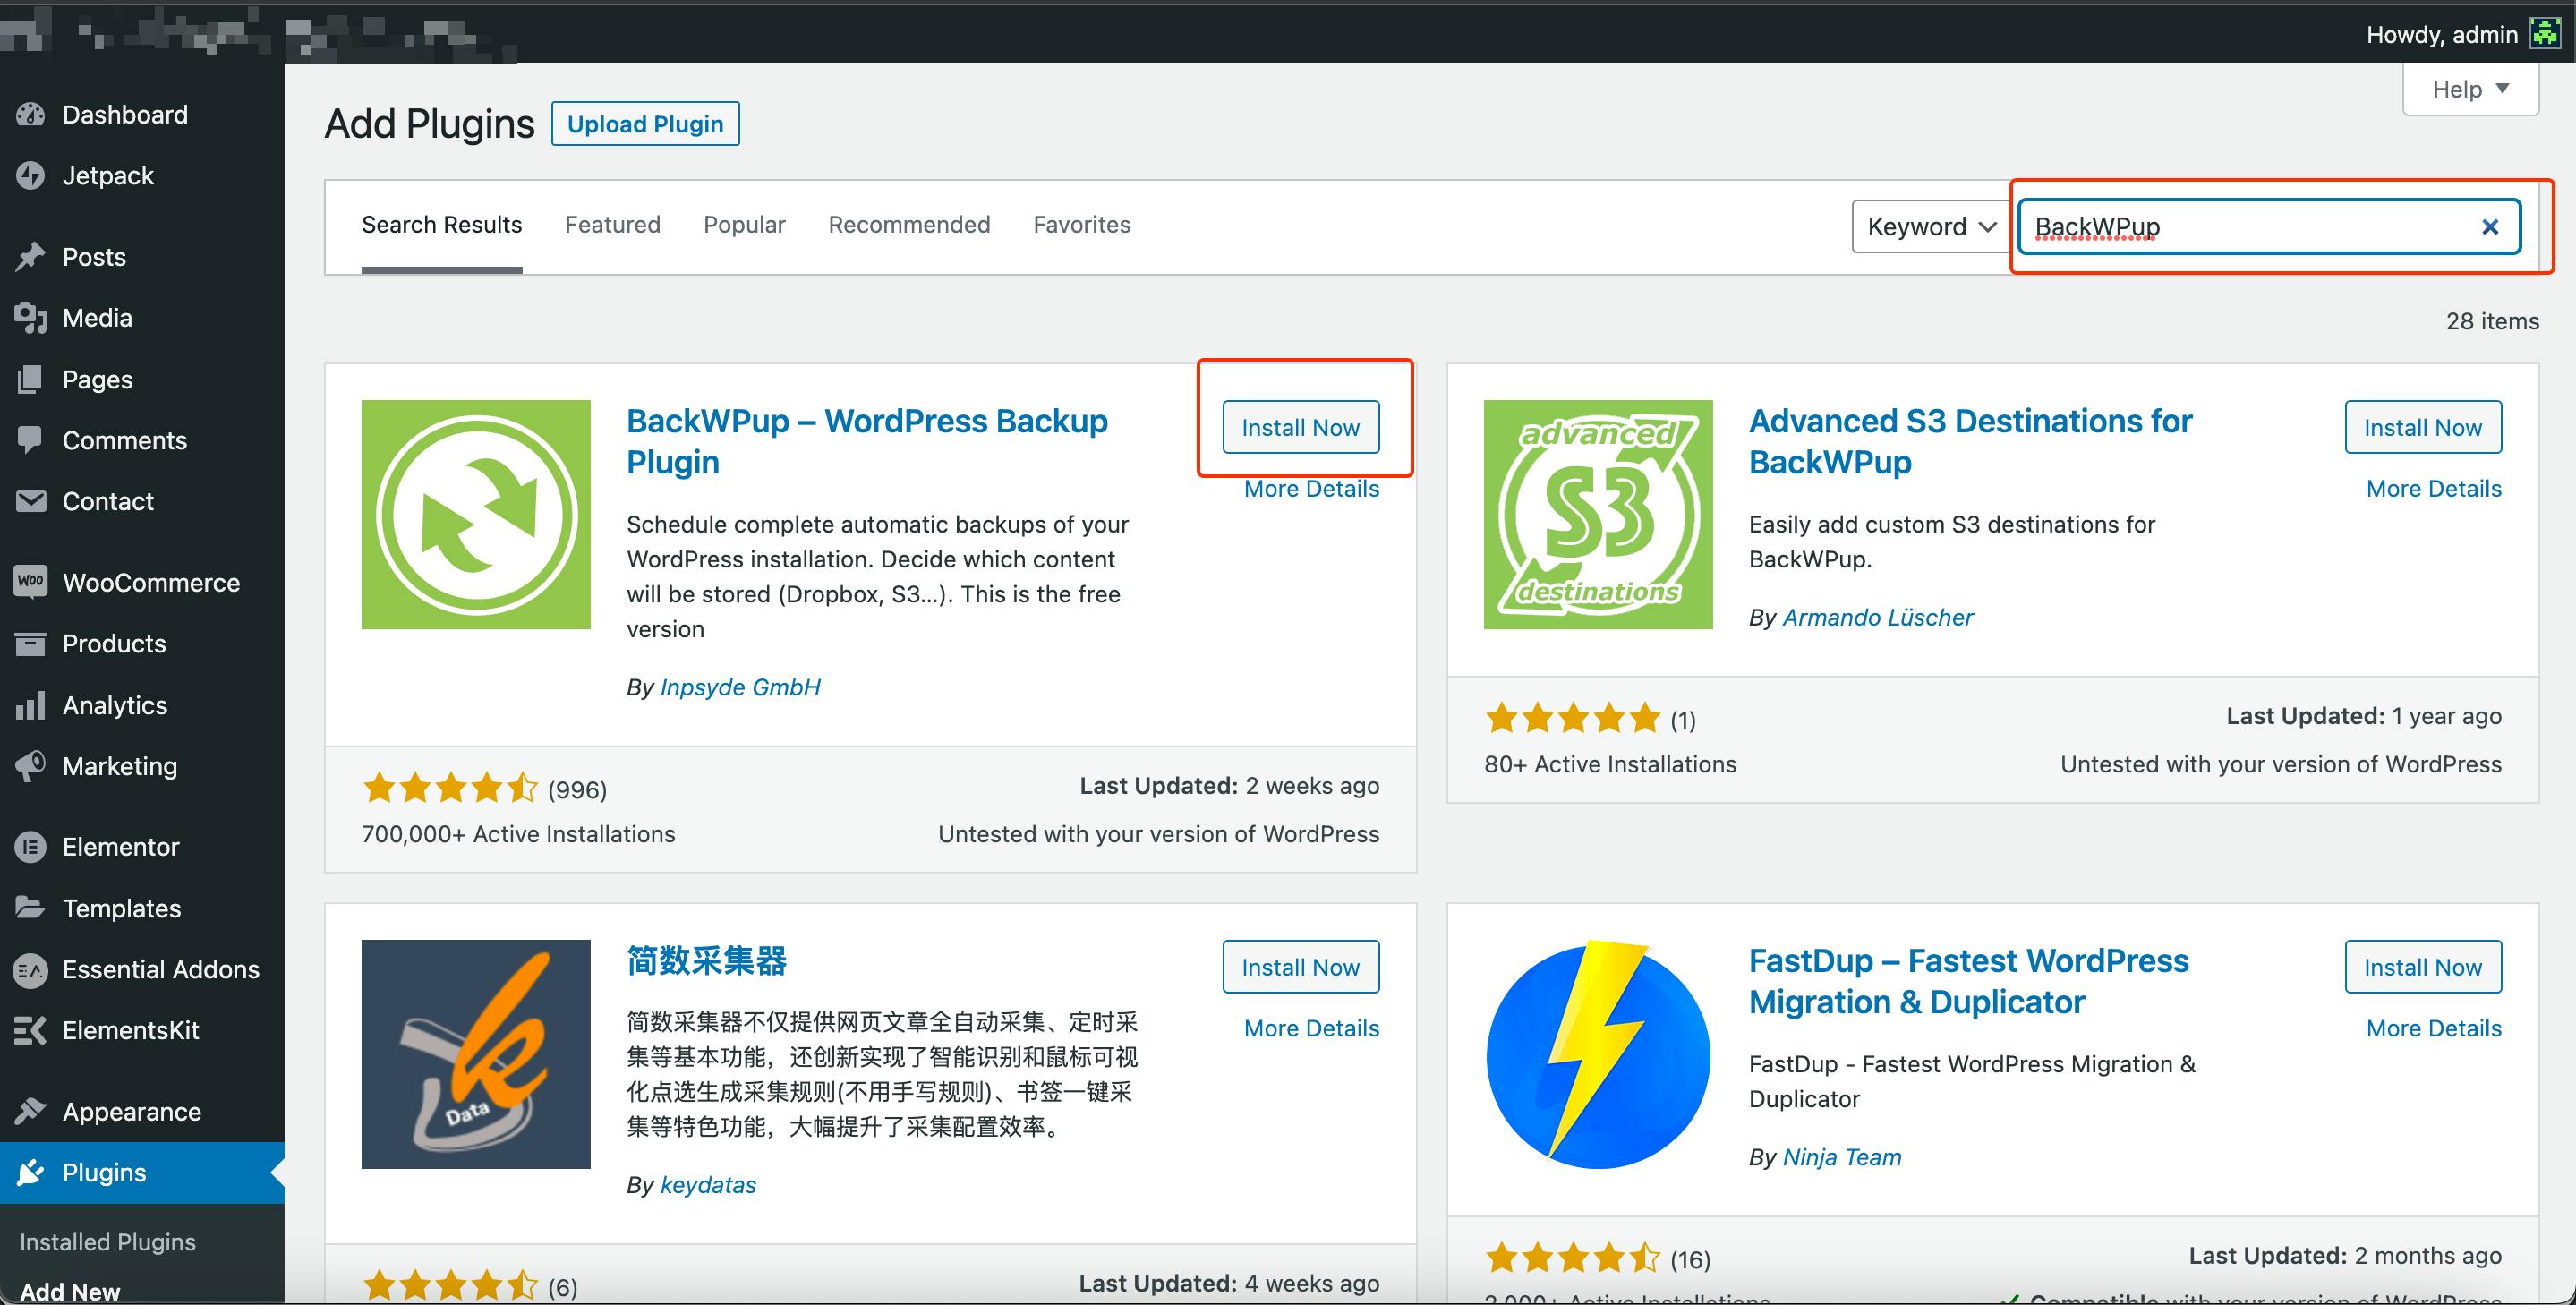
Now Search for BackWpup and click on the install button to install the plugin.
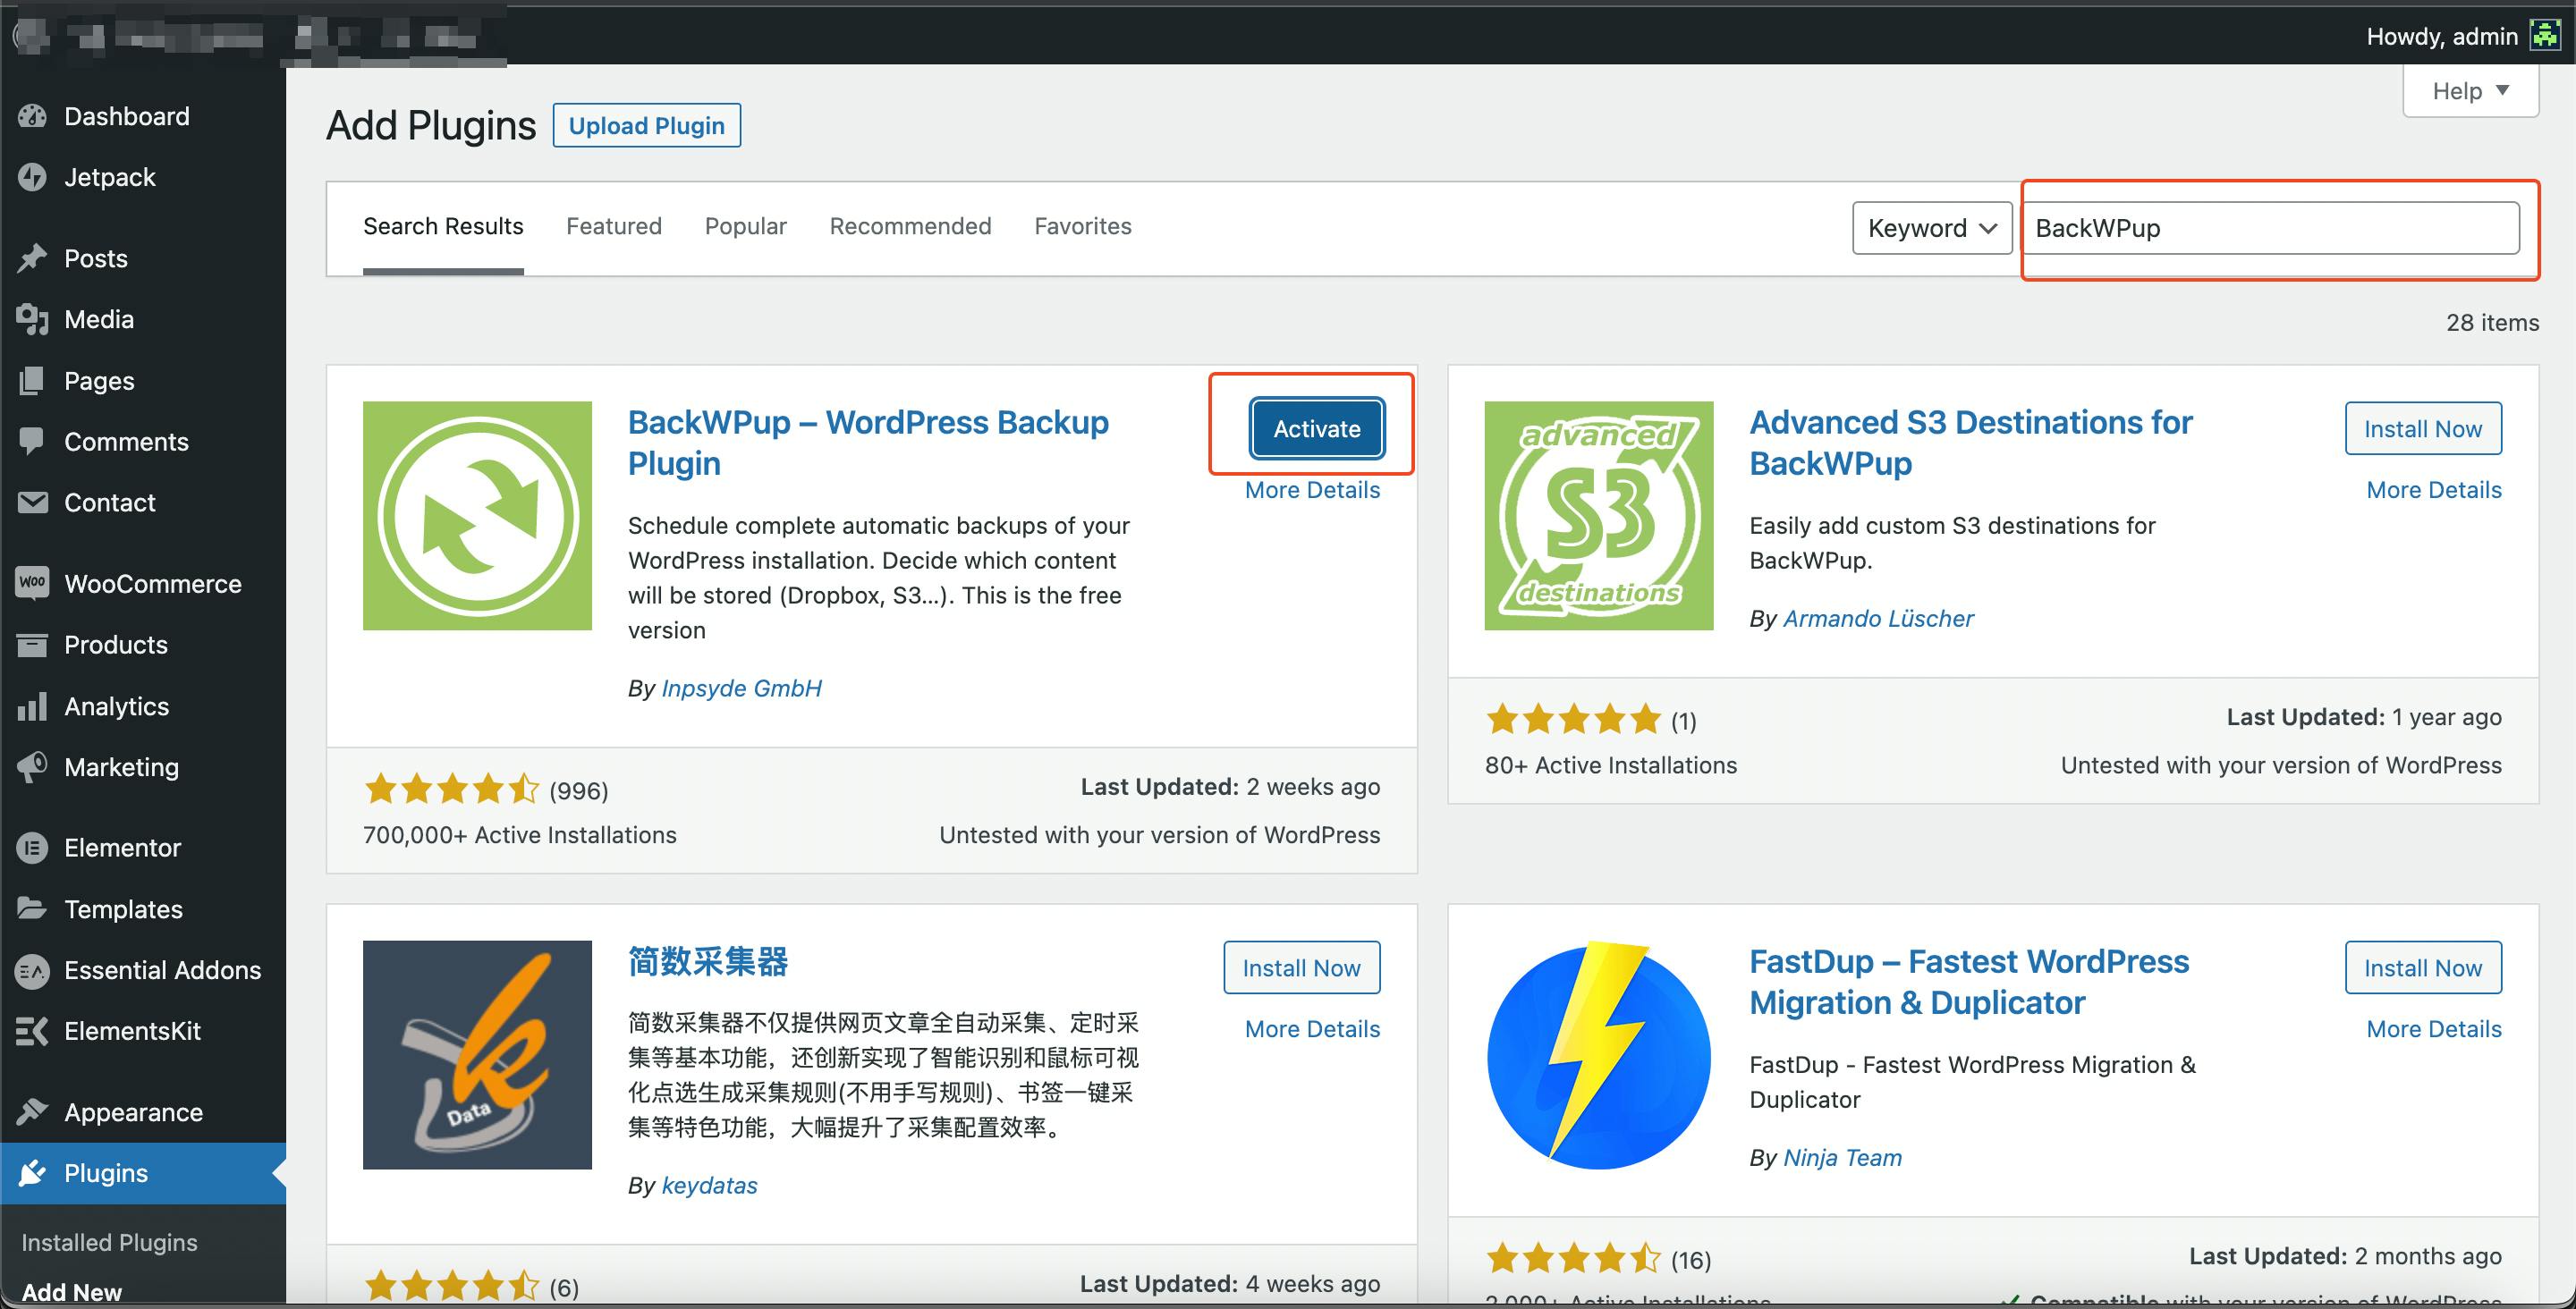
After Installation is done, click on the Activate button to activate the plugin.
Configure the plugin
Creating a job
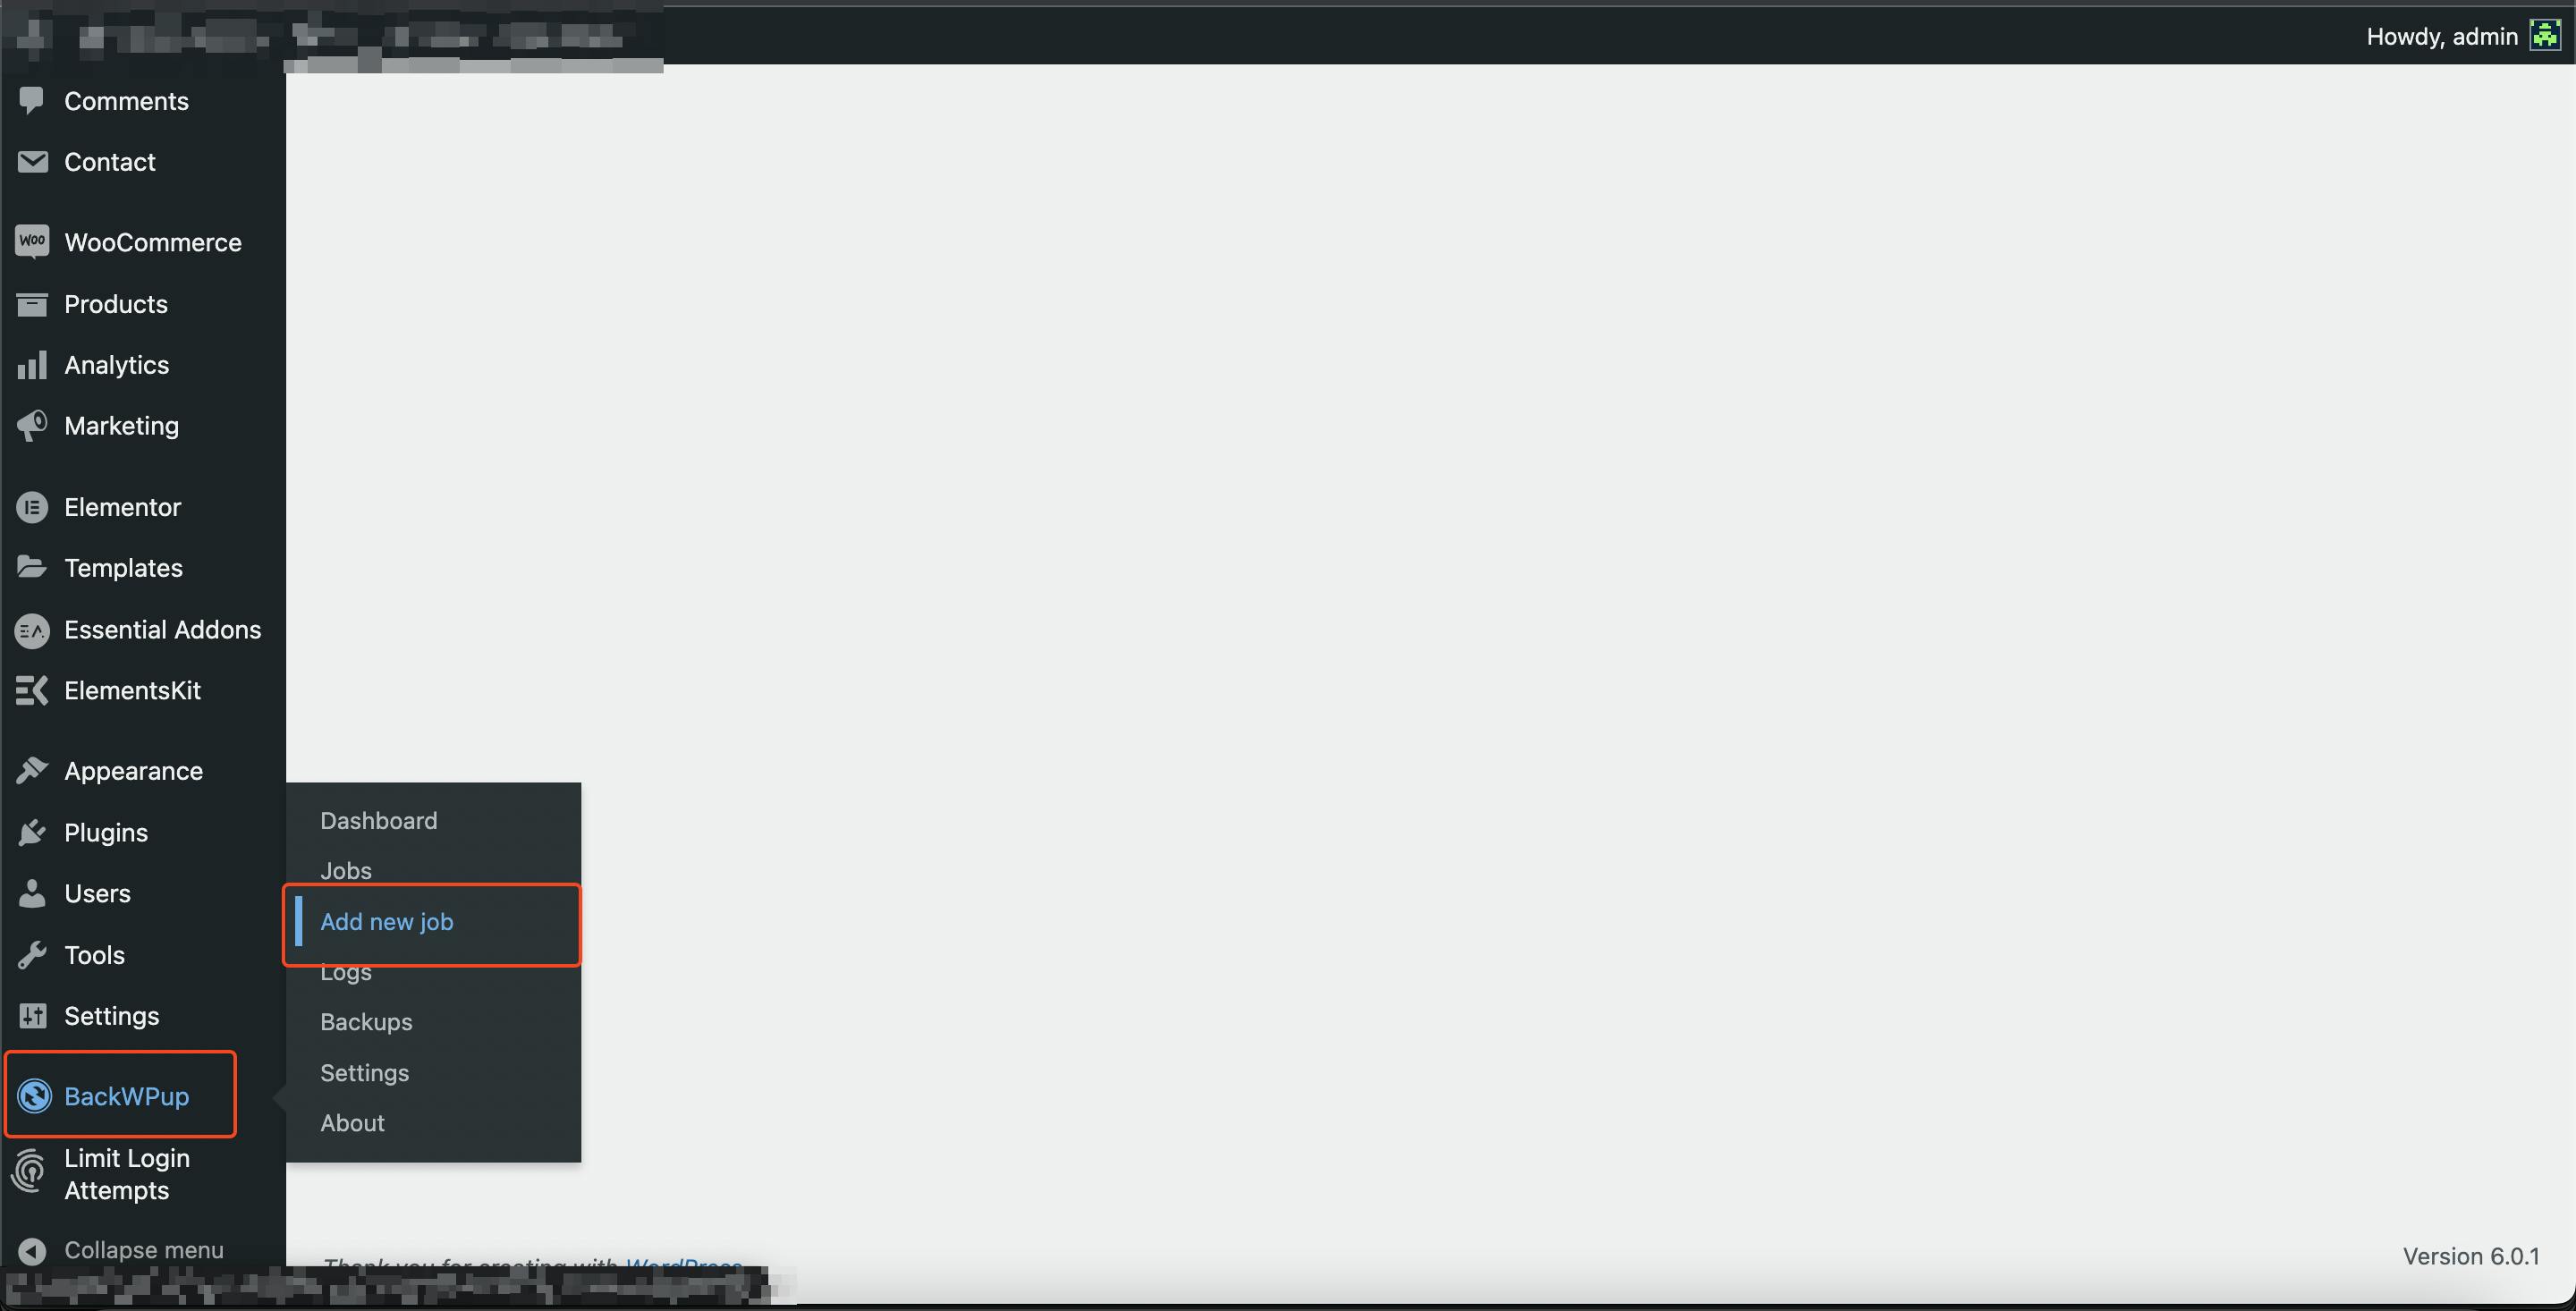
From the left panel click on BackWPup, then click on Add new job and It will take you to the Add Job page.
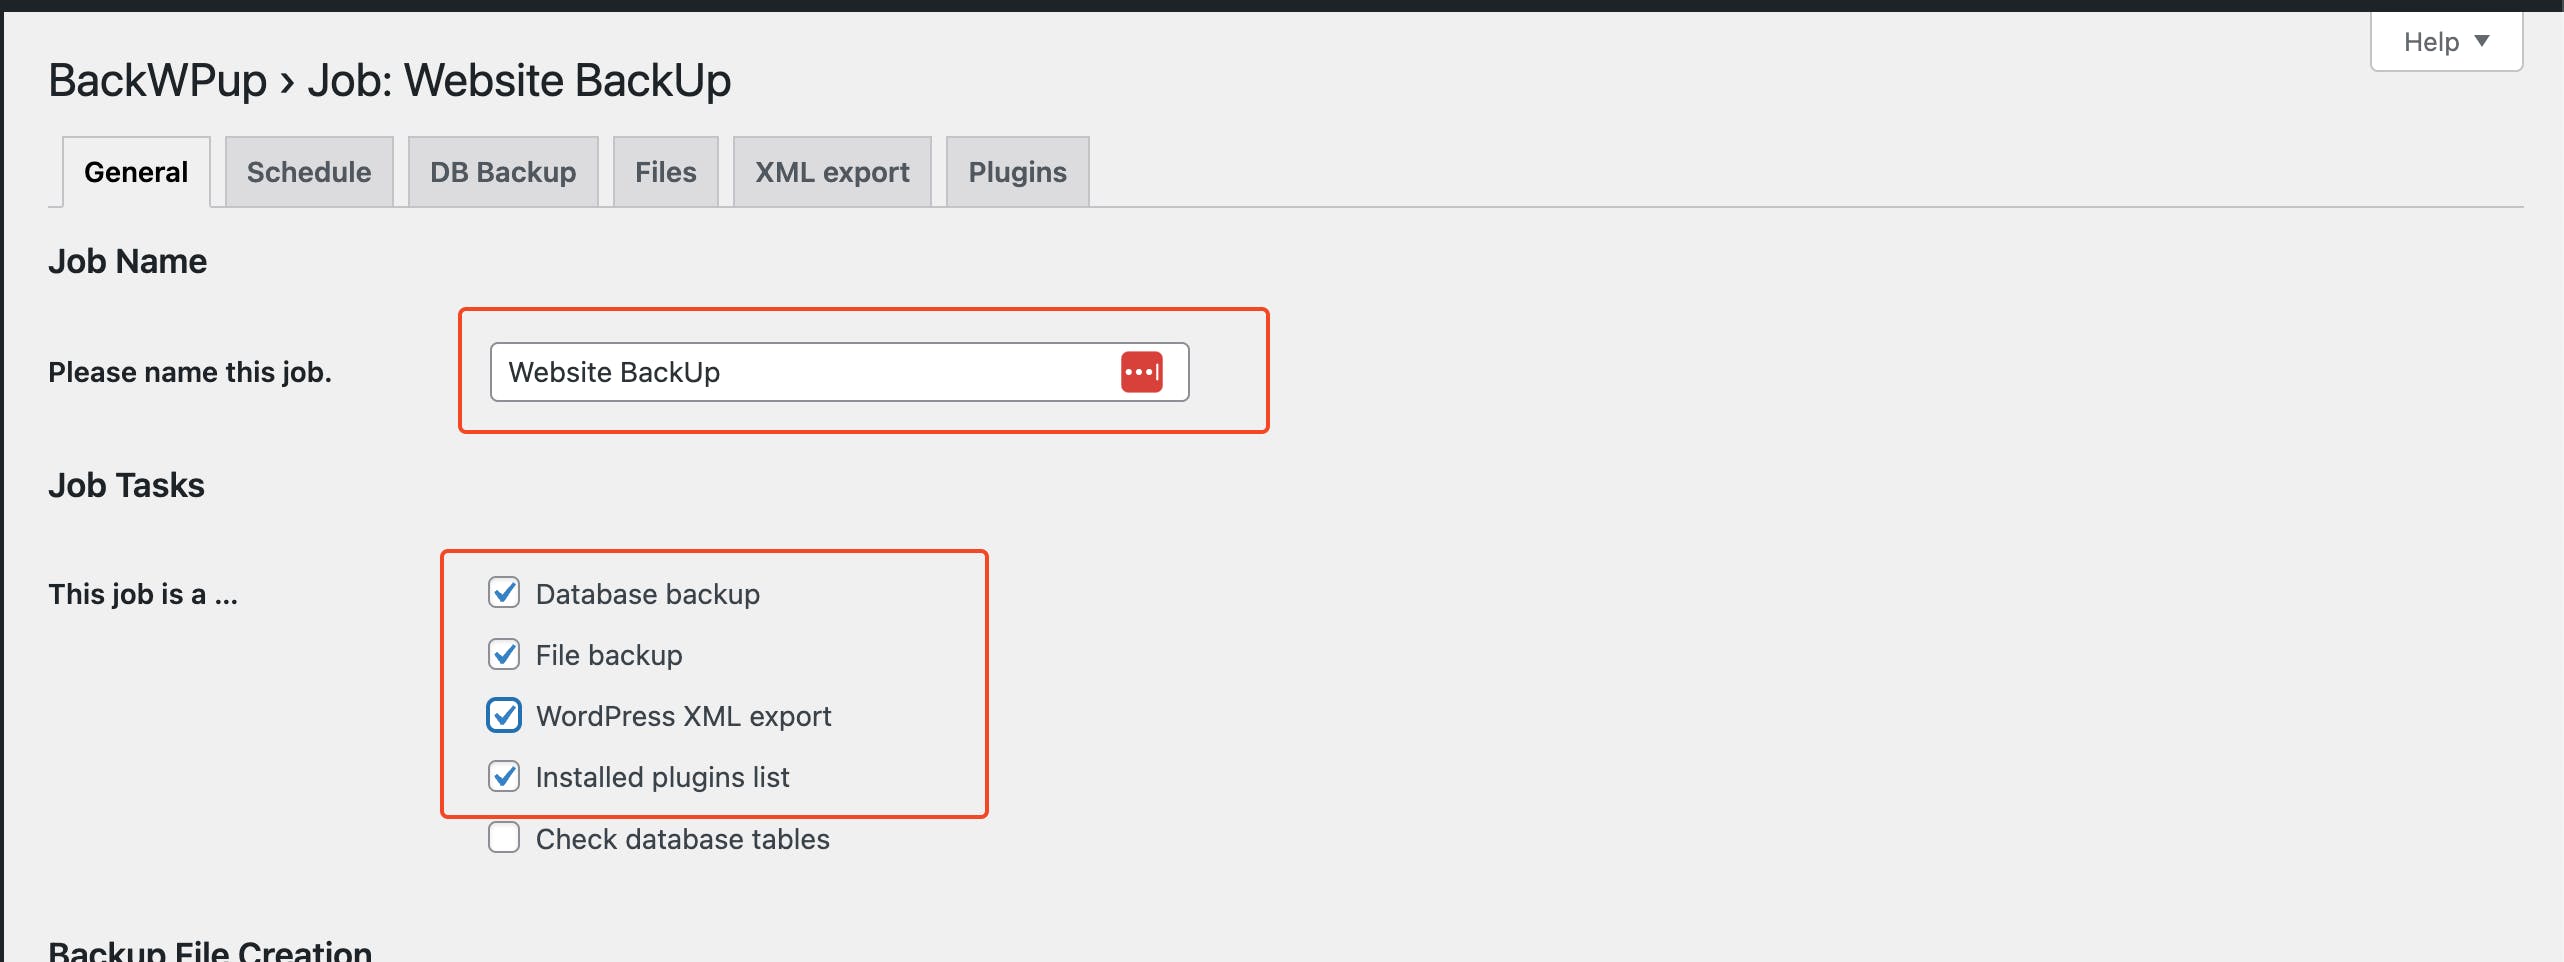
Now, provide the name for the job, I have given Website BackUp. you also need to select what this job is for, I have selected four things.
- Database backup
File backup
WordPress XML export
Installed plugins list
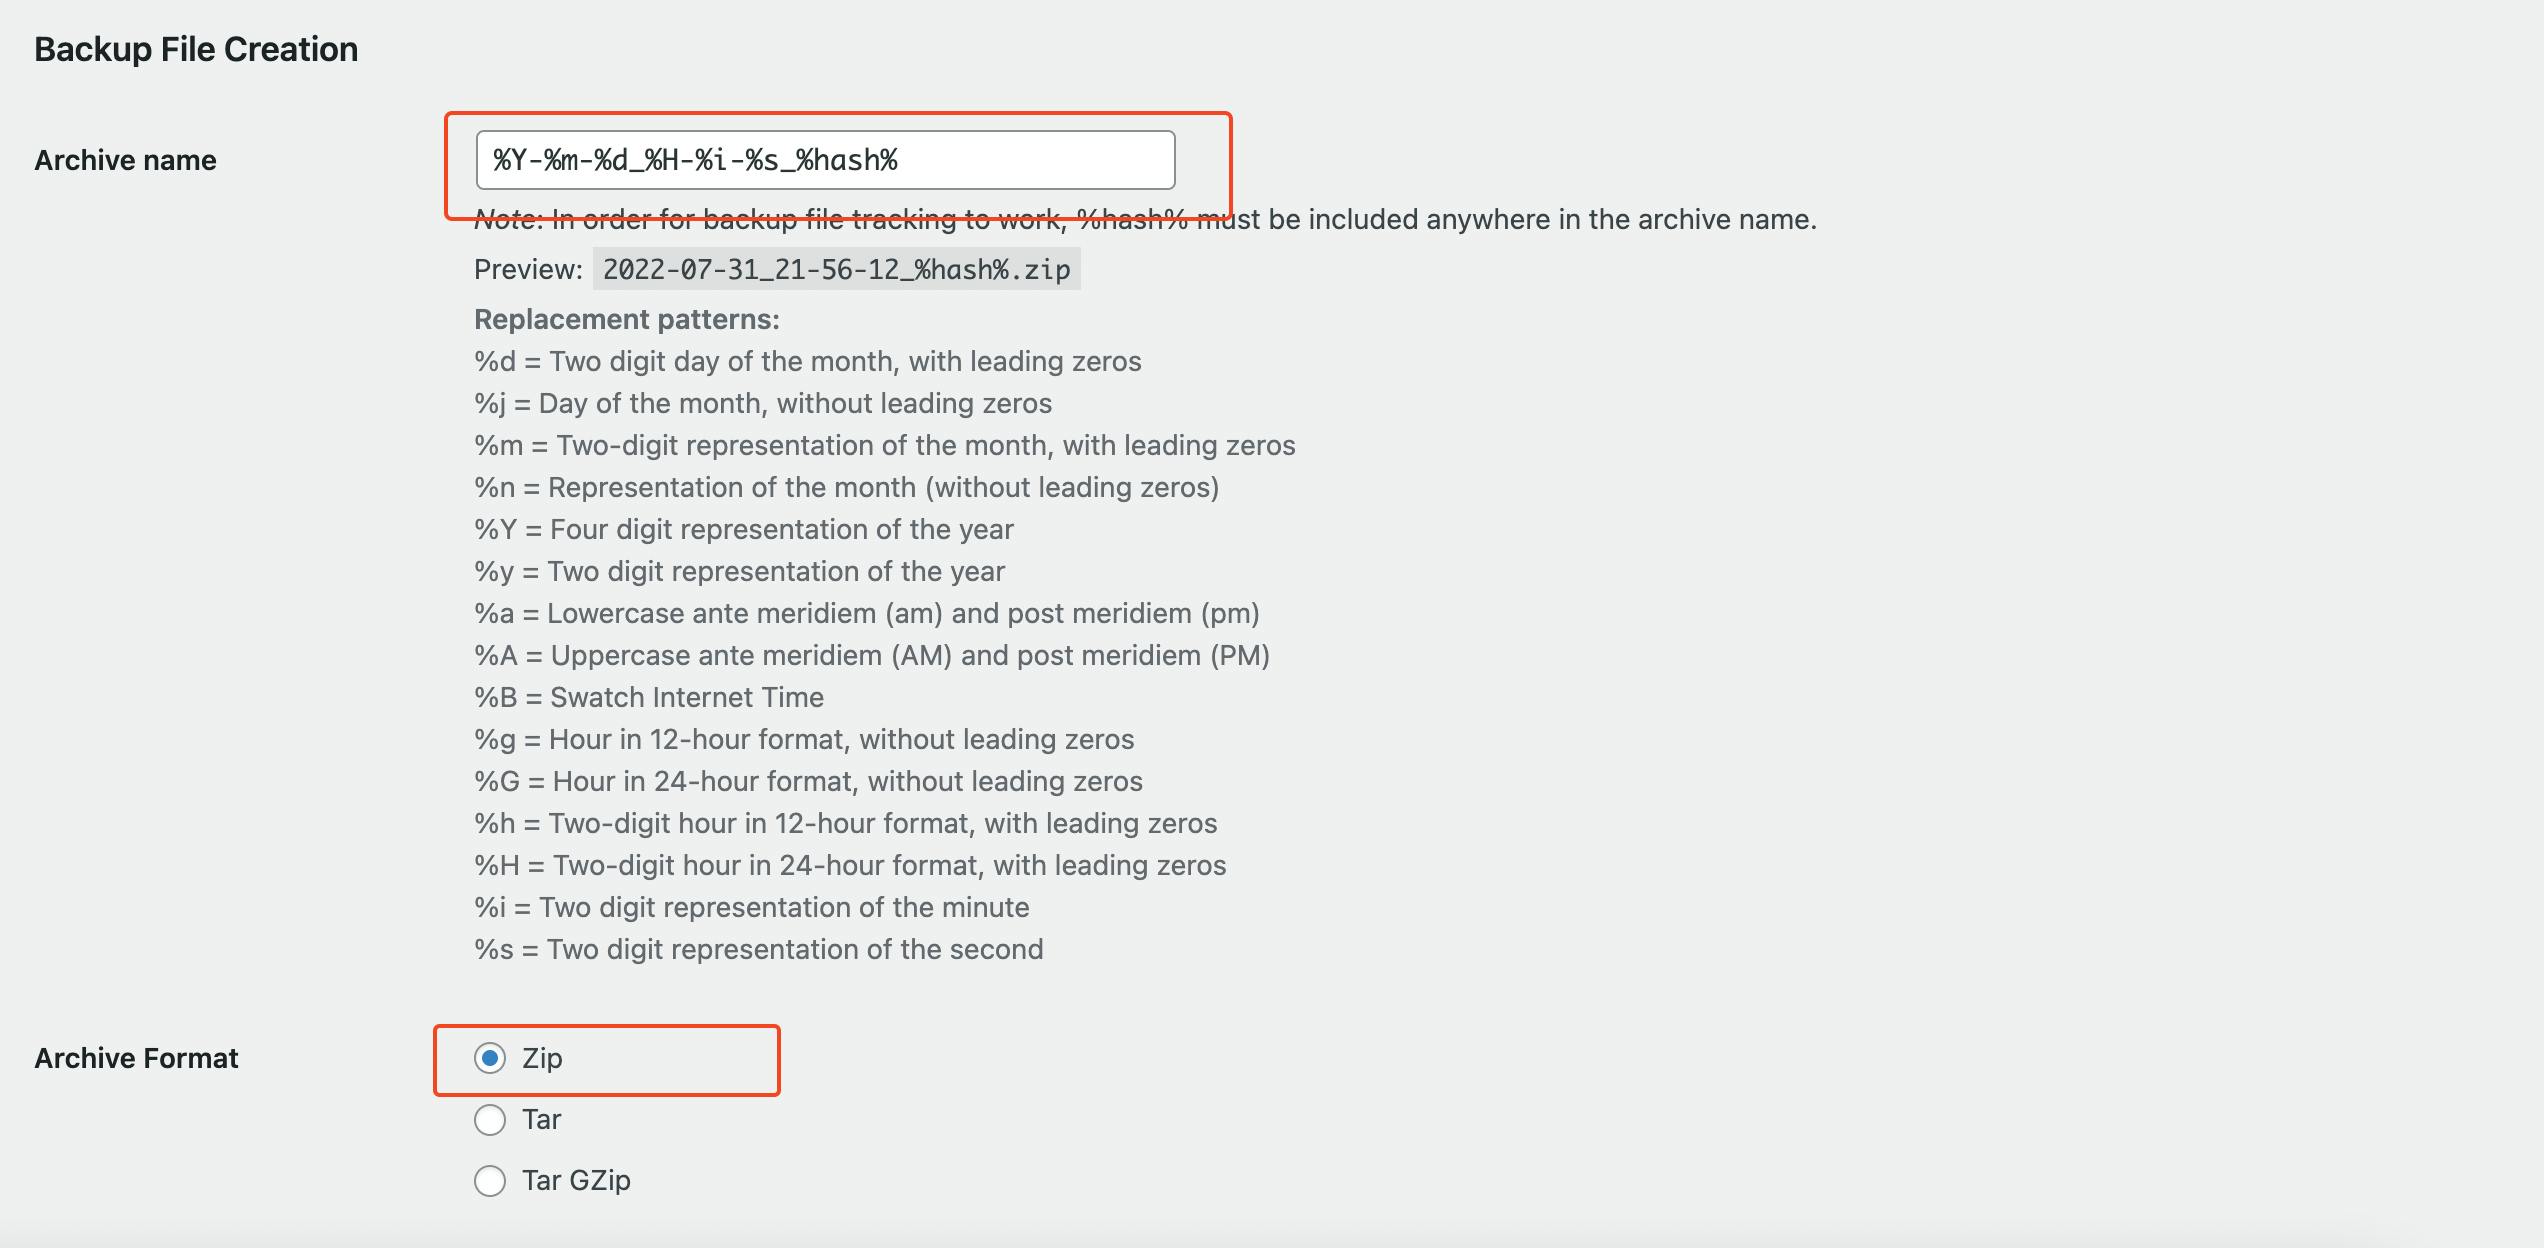
Next thing, you have to specify the archive name and archive format. I have selected zip for my backup file and date-time for the archive file name.
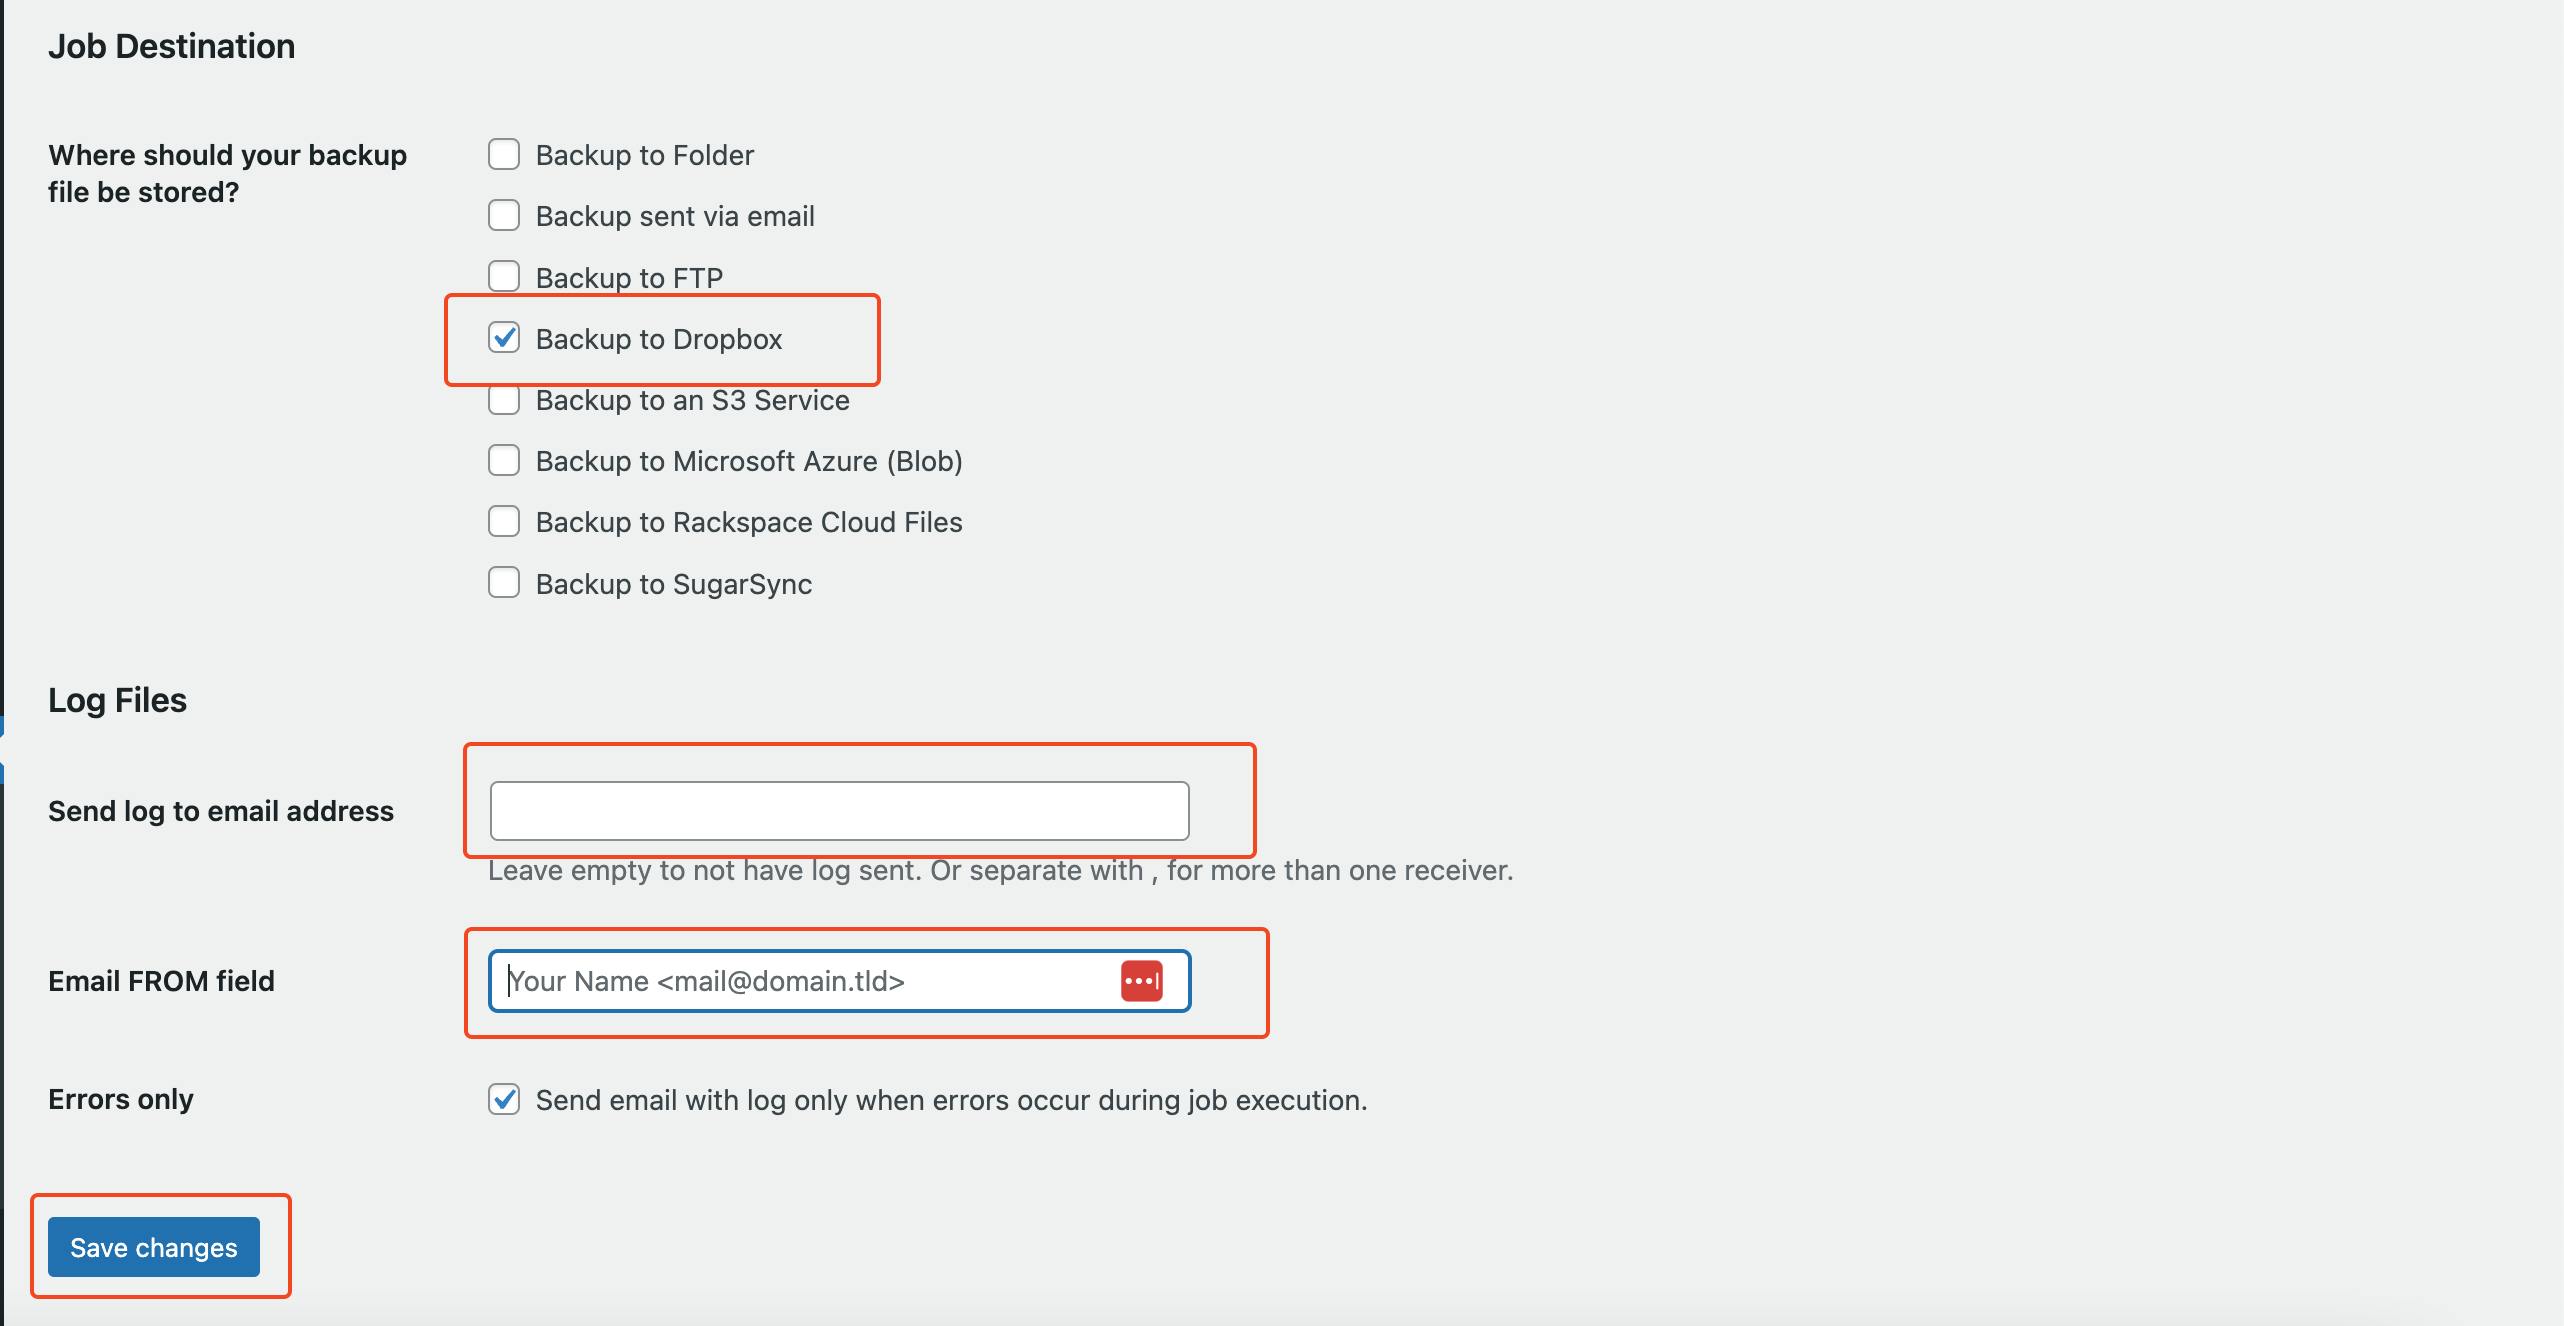
Finally, you have to select where your backup files should get stored, please select dropbox.
You can also add email addresses for getting logs if your jobs get failed.
Once everything is done, click on the save changes button to save your backup job.
Scheduling a job
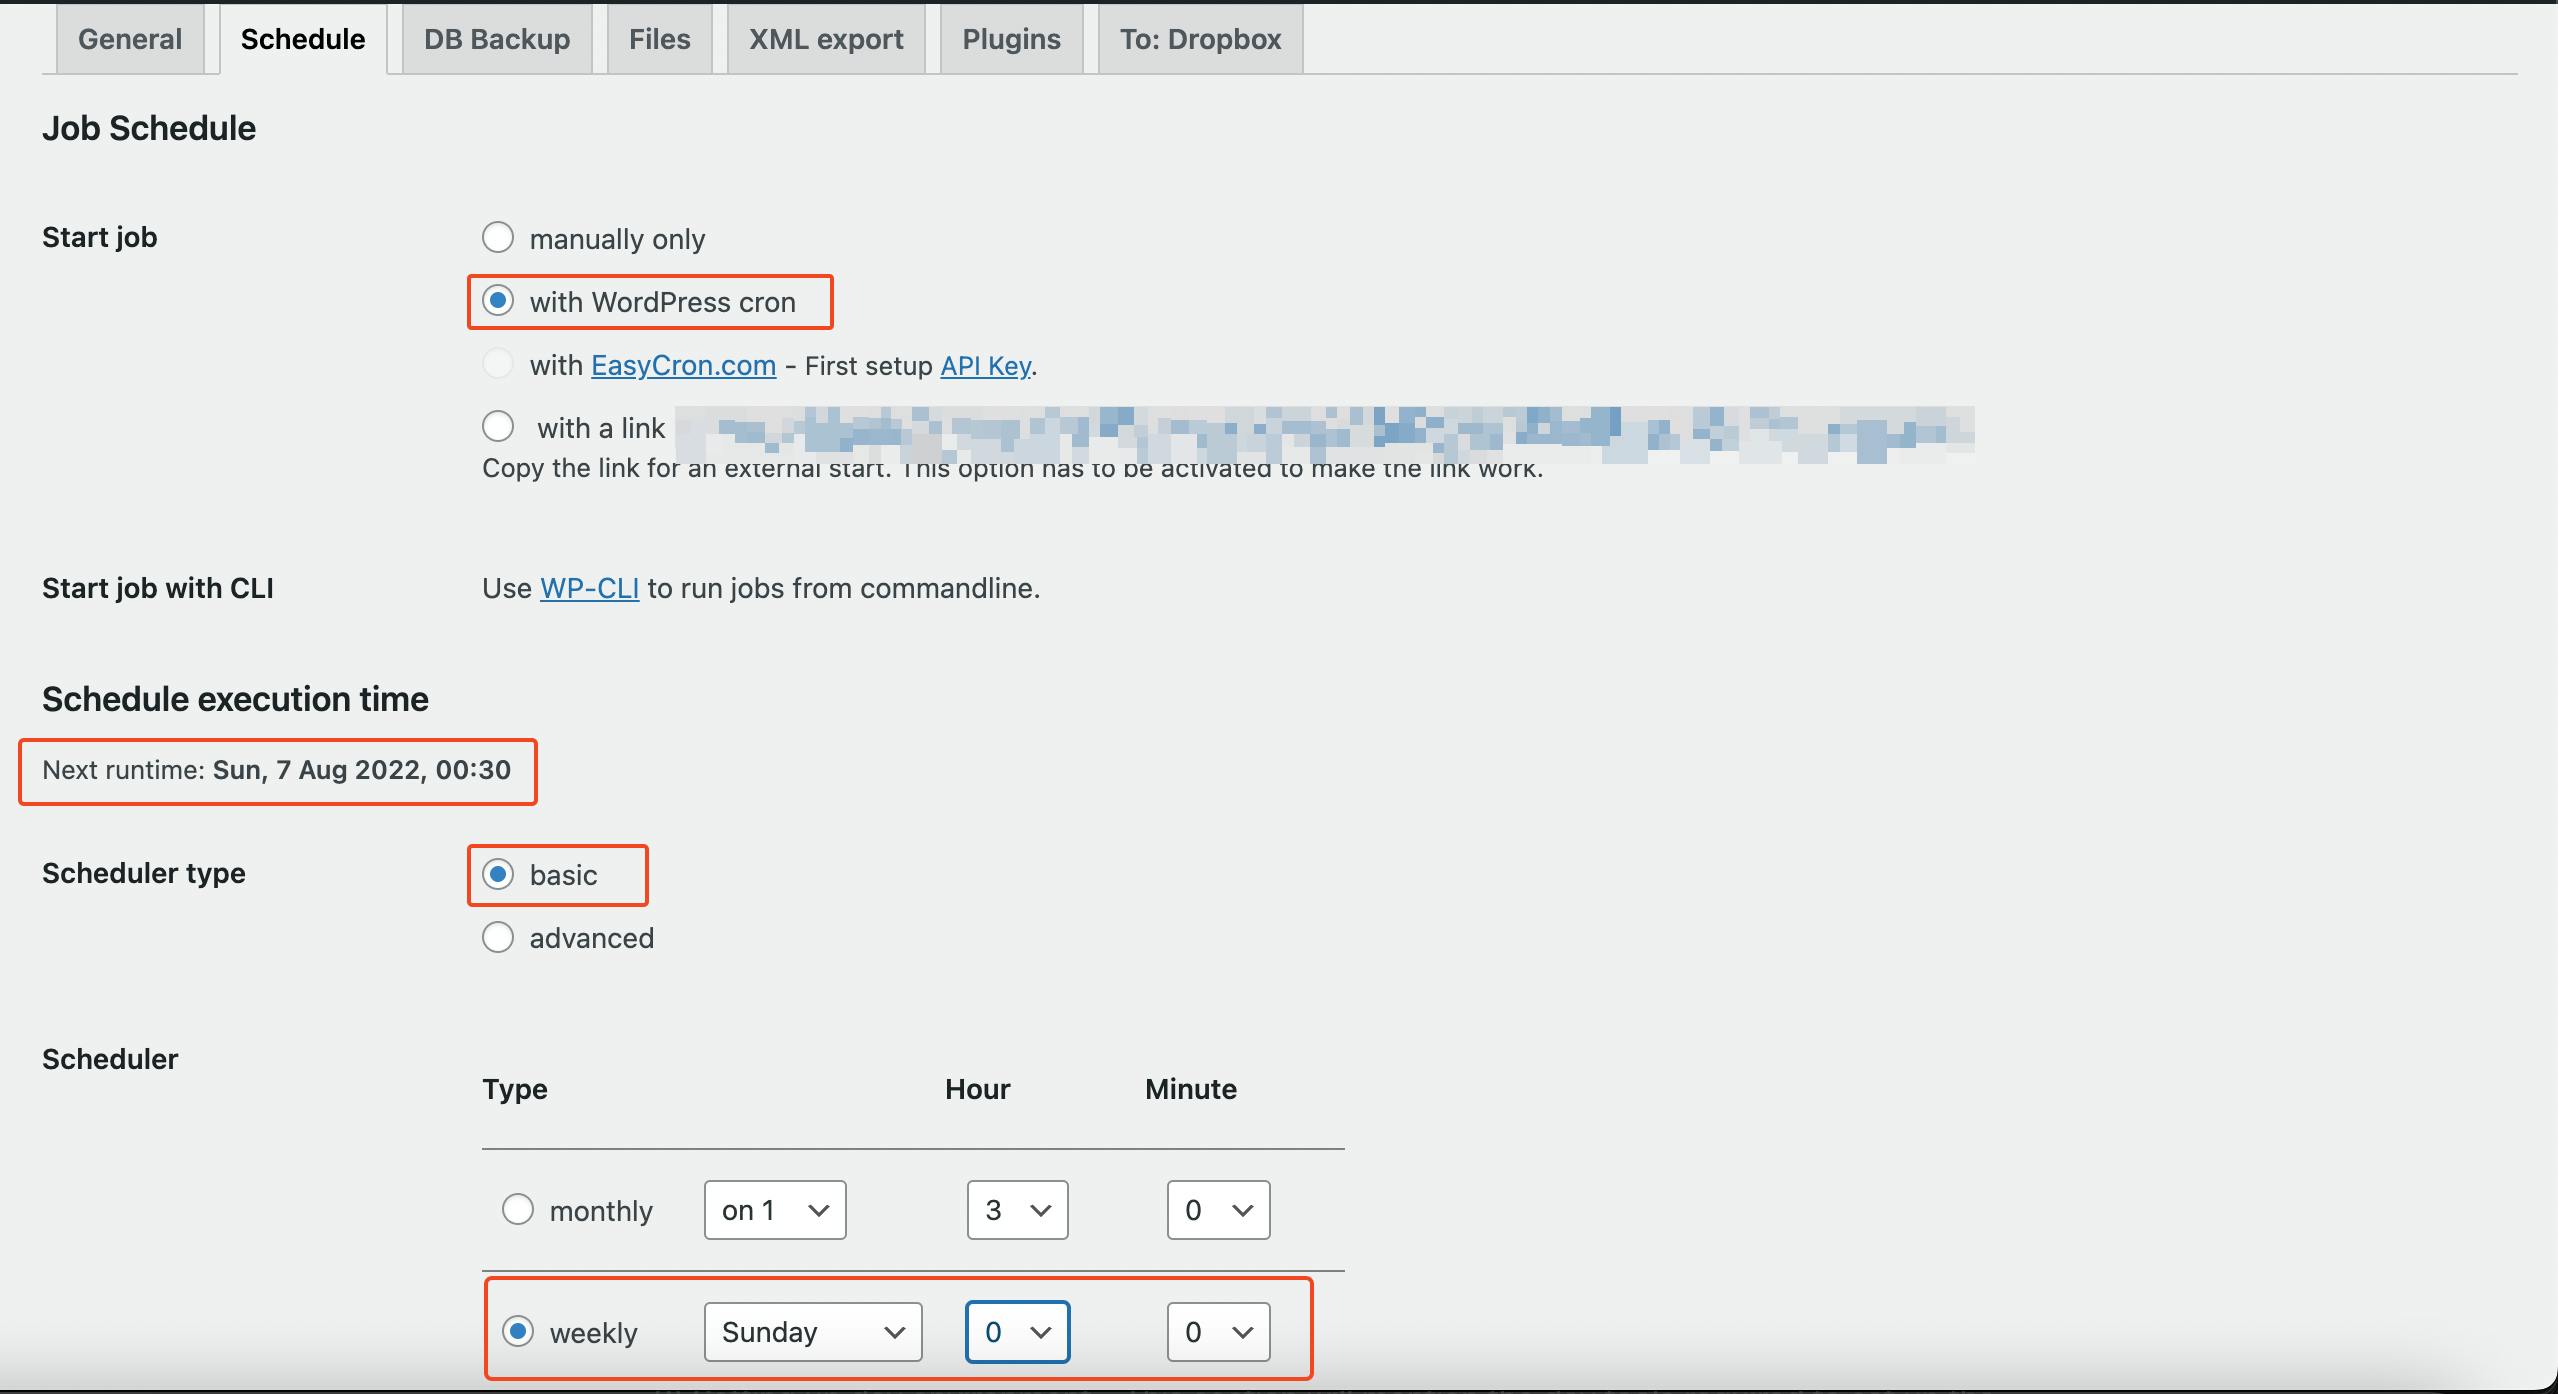
You have created the job, now you will need to configure when this job should run.
Select the with WordPress cron option then select basic for scheduler type and weekly on Sunday for the scheduler.
Adding dropbox account
Earlier you selected the dropbox option for storing your backup files, so to make that work you will have to add your account to BackWPup using dropbox auth code.
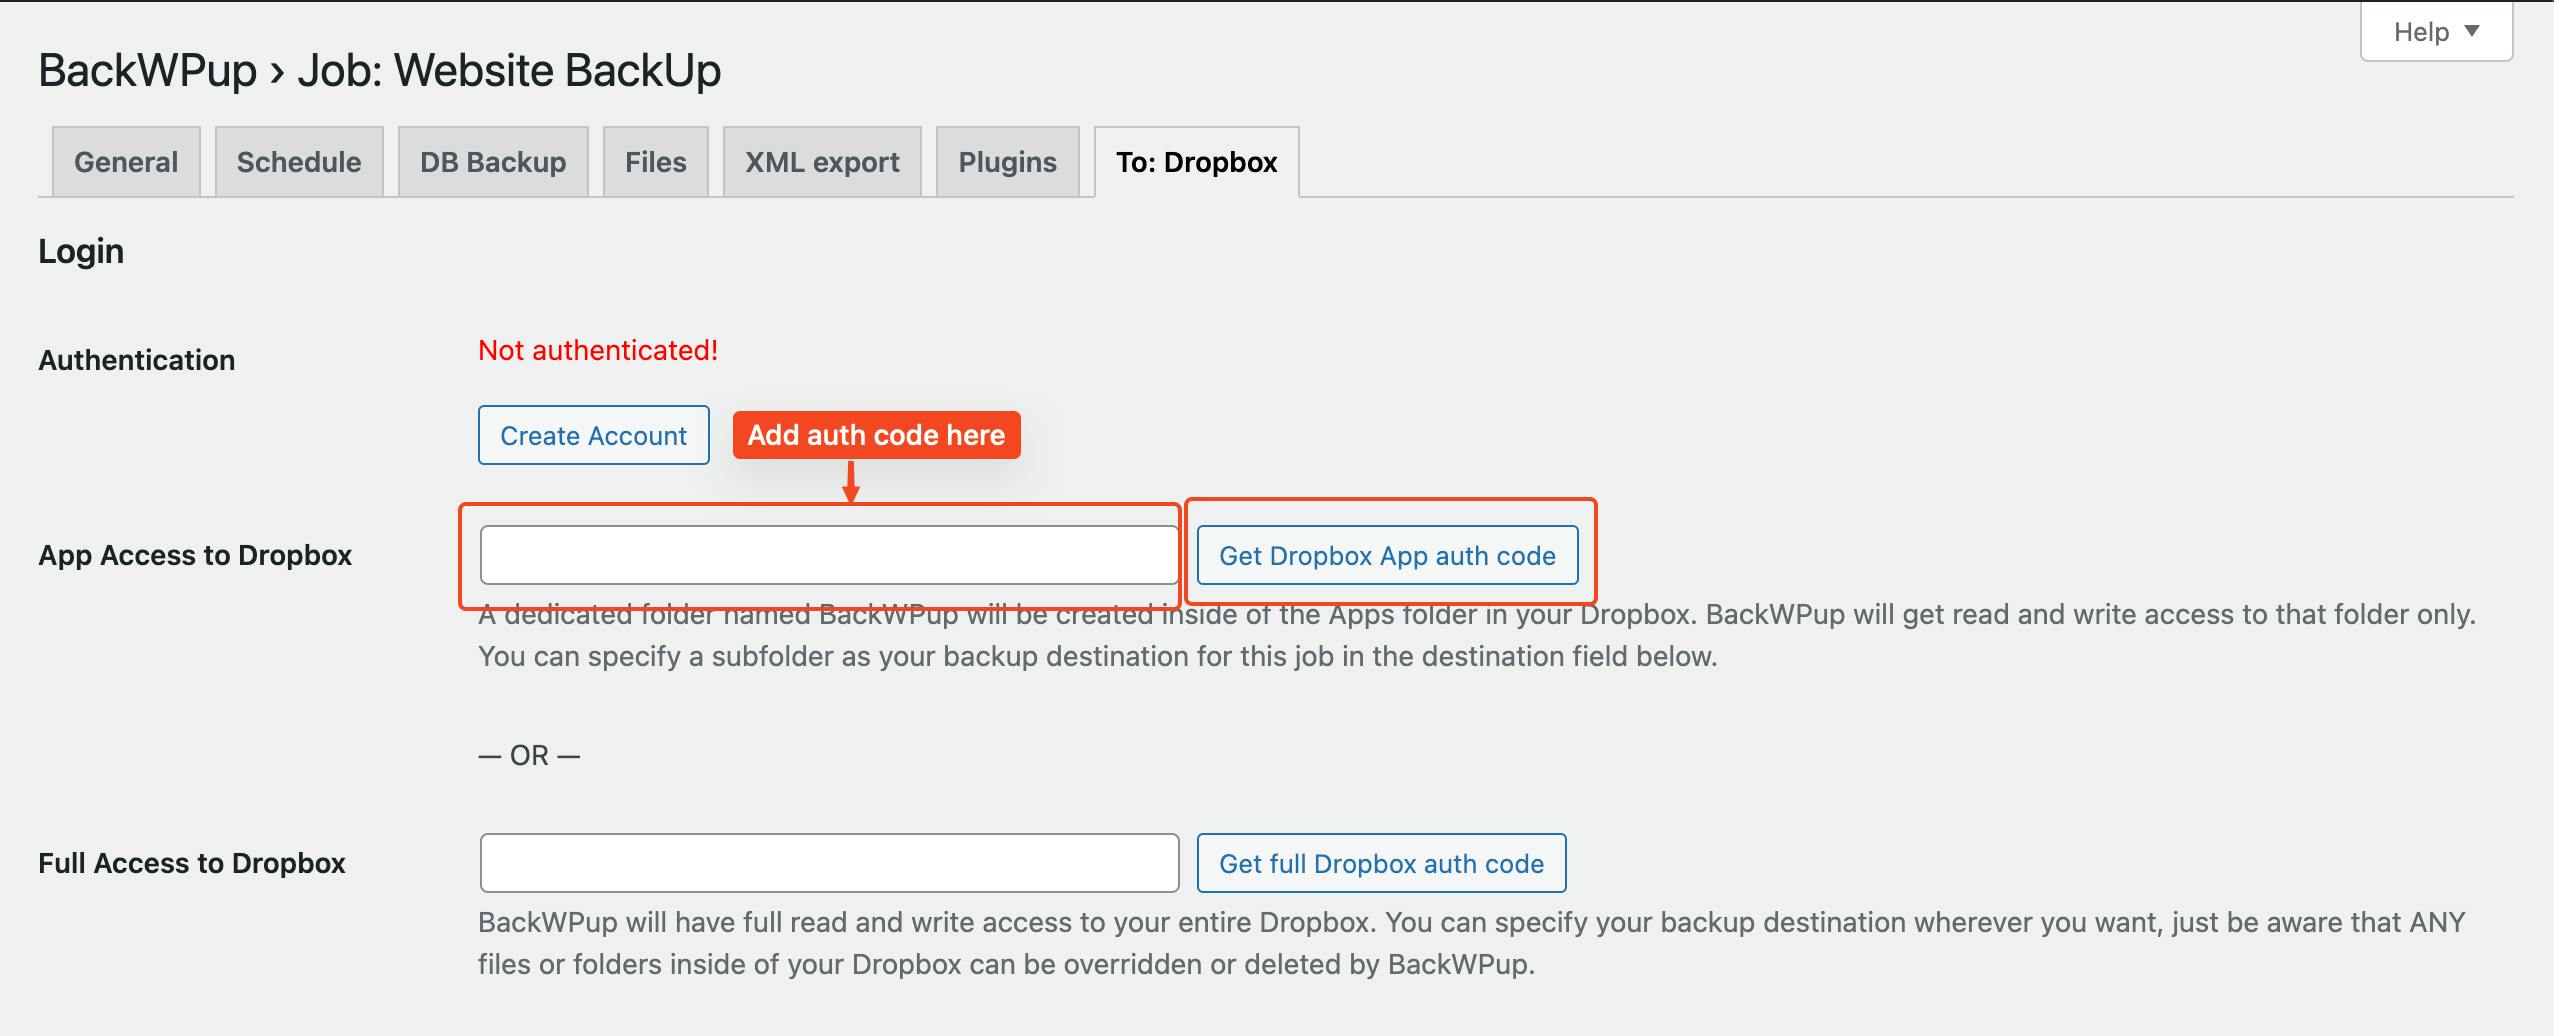
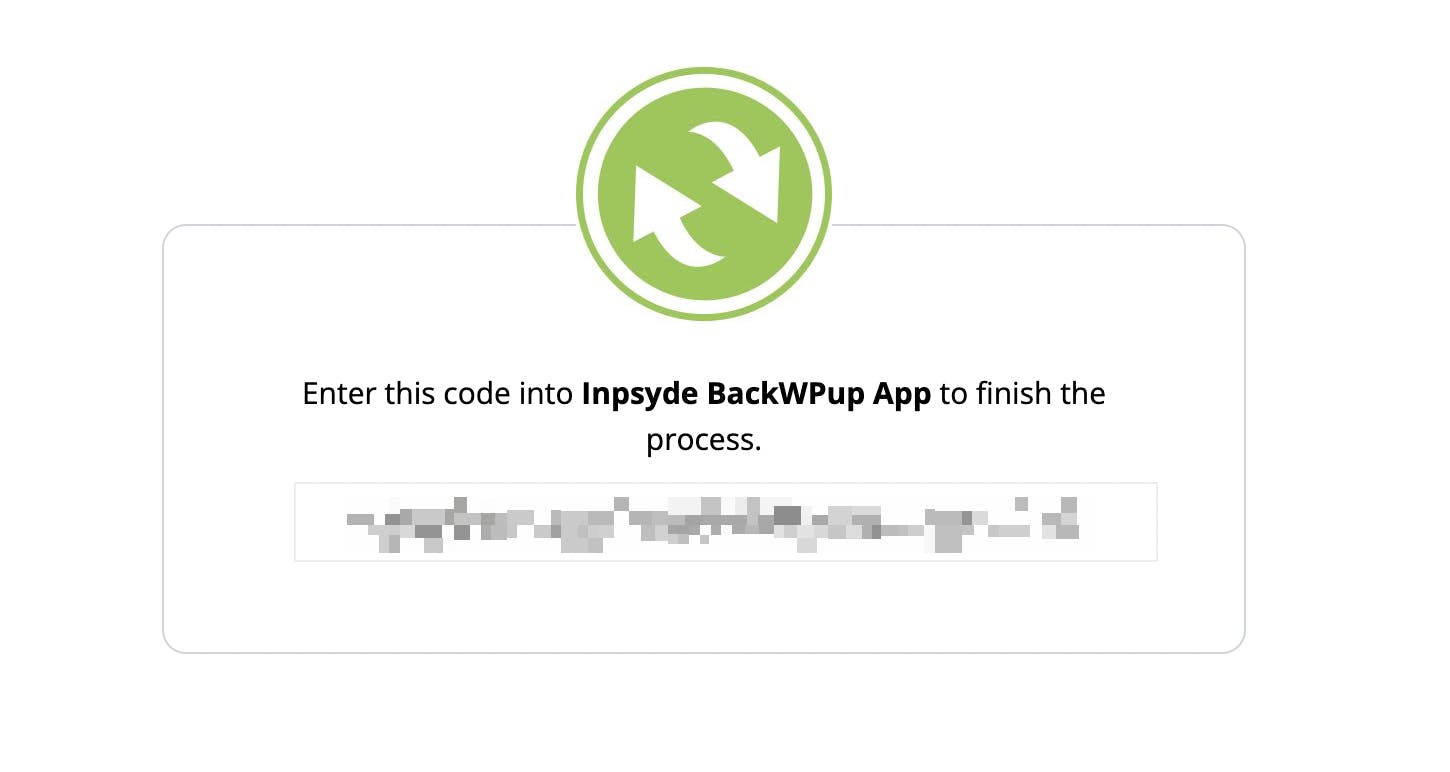
Click on the Get Dropbox App auth code button and it will redirect you to the dropbox auth page.

Click on the Allow button and it will provide you with auth code, copy that and add that to auth code input.
Now click on save changes to save the auth code.
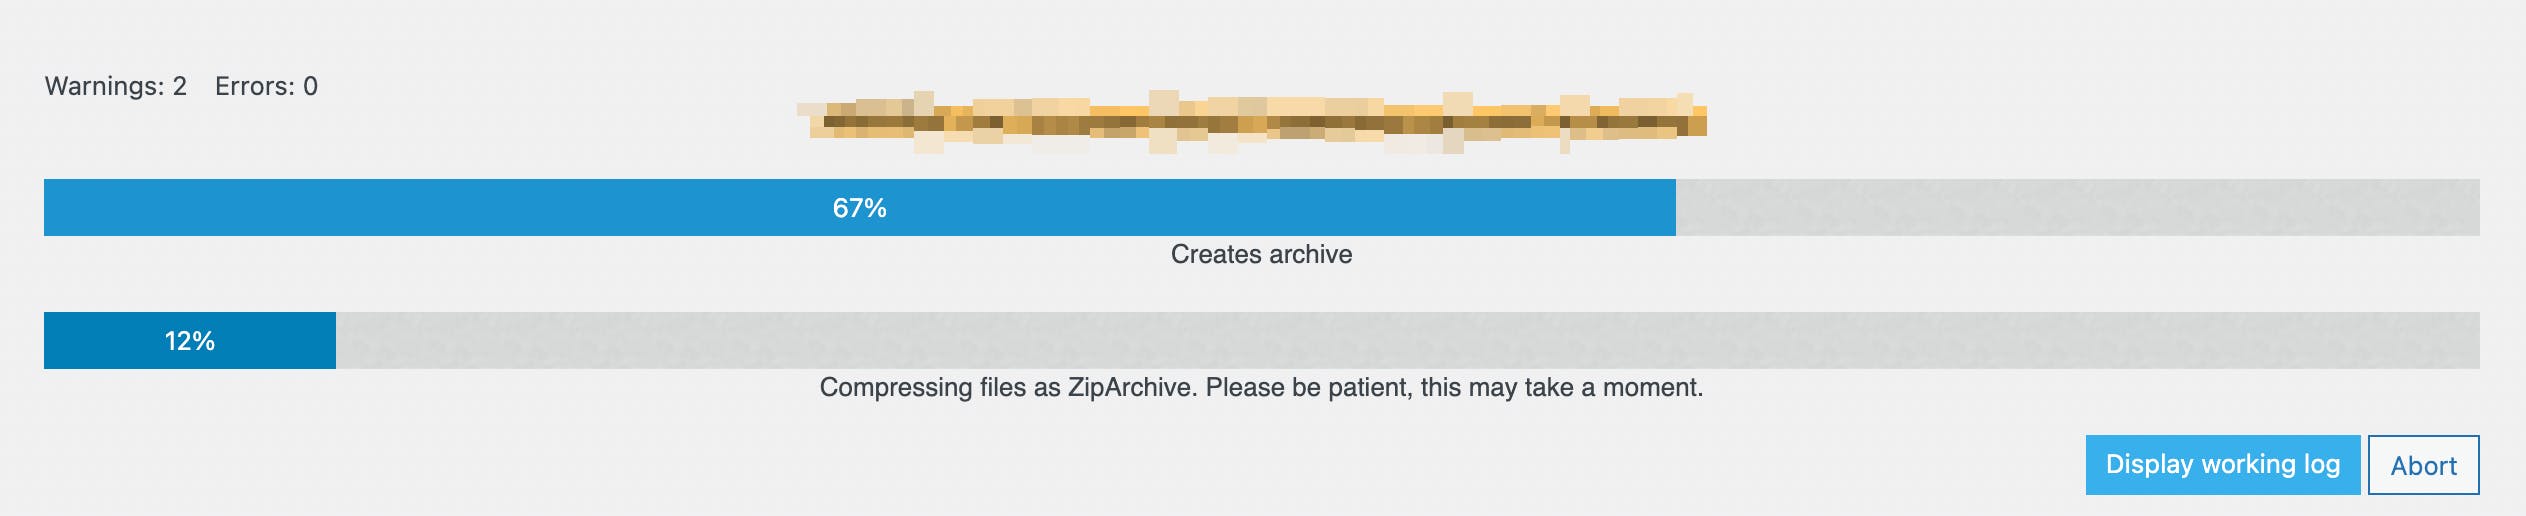
Alright, you have created the backup job, now let's run that job and see things in action.
From the left panel click on BackWPup, then click on jobs and It will take you to the Jobs page, there click on the run now option and wait for the job to finish.
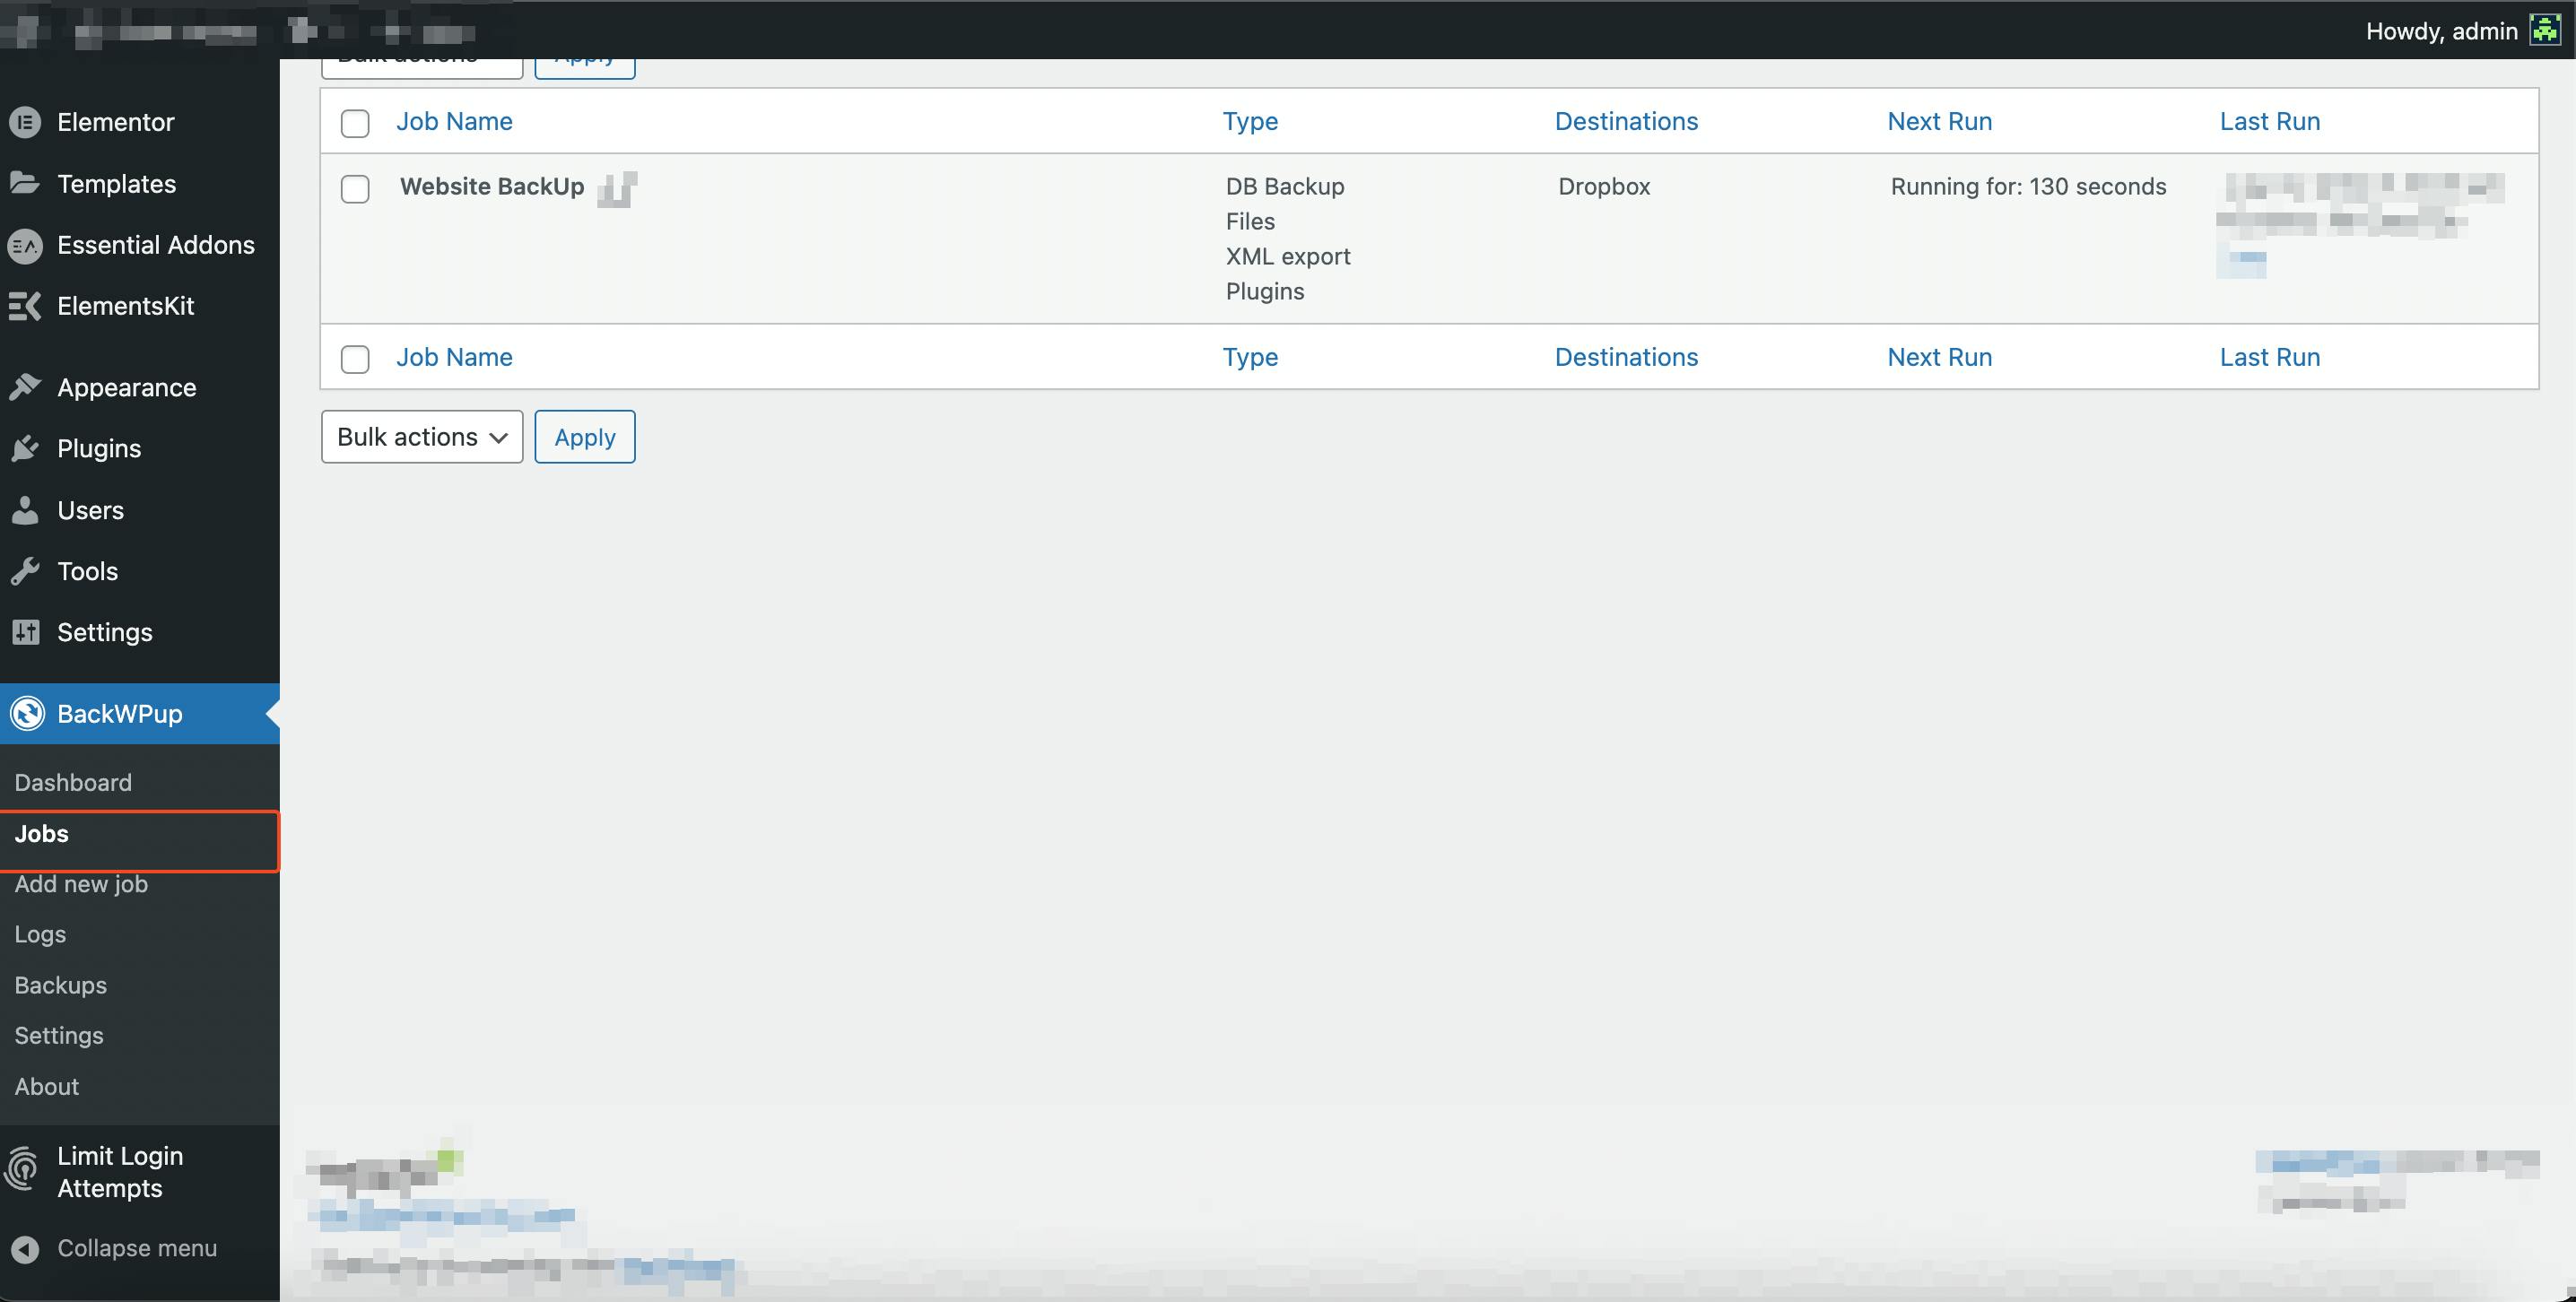
After the job is completed, you can check into your dropbox account backup files will be stored there.
And that’s it for this topic. Thank you for reading.
Connect with me
Subscribe to my newsletter to get my latest post in your inbox directly.